
A Straightforward Swimming for Triathlon Guide To Efficient Technique, Better Endurance & Unshakable Triathlon Swimming Confidence.
Why I Wrote This Guide
I started swimming 10 years later than every one I was racing against.
In my first season, my competition was doing 8000m+ of swimming per day to prepare for their A race. Meanwhile I was barely making it through the warm up.
I struggled to understand what great technique looks like. And wanted to know how to swim further and faster without my form falling apart.
I had big goals. But my swimming needed a lot of work if I was going to achieve any of them.
An overwhelming majority of triathletes wish they had started swimming earlier in their lives. If you’re like me when I started, you too are just trying to understand what great technique looks like and how to swim further and faster without your form falling apart.
Is your goal to:
- Fix your technique and build up your swim fitness?
- Close the gap between you and your competition in the swim?
I wrote this guide to speed up your learning curve and help you get there faster.
Think of it as your swimming for triathlon “Cheat Sheet”. A concise set of instructions on how to swim with efficient technique, build better endurance and grow unshakable triathlon swimming confidence.
– Rory Buck
What Are You Struggling With Most?
This swimming for triathlon guide has been written so you can read each section on it’s own and still learn exactly what you should be doing. If you are struggling with something in particular, you will be able to quickly and easily jump to the section and get clarification on what you should be doing and how you should be doing it.
Having said that, you will get greater clarity on the big picture when you read each section in order. In addition to telling what to do, it will show you how to piece together all of the elements of great triathlon swimming.
Download your own PDF version of this guide.
You can read it (and re-read!) it whenever you want. The PDF version also includes:
- 6 Detailed Drill Videos
- 7 Detailed Explanation Videos
- 10+ links to additional articles, guides and podcasts and a pace calculator
It’s high quality, practical advice you can immediately start using in your swim workouts!
Learning & Practicing
Efficient Technique
“Technique will set the limit on where your fitness will take you”
Your swim technique will set the limit on where your fitness will take you. You can train harder and get fitter to shave mere seconds off your best times. Or you can improve your technique and save minutes.
Simply defined, good swimming technique is your your ability to:
- Reduce Resistance
- Increase Propulsion
Reducing Resistance Is Your First Priority
Resistance (also known as “drag”) is a force that slows you down as you move through the water. As you swim forward you push water out of your way, as you do so, the water pushes back on you. The less resistance you have to work against, the faster and more effortlessly you will swim.
I’ve seen triathletes drop 10+ seconds per 100 in less than 30 mins. They didn’t get any fitter during that time. They learned how to reduce their resistance and get into good balance and alignment. This is why it’s your first priority, and we’ll discuss it first.
Increasing Propulsion Is Secondary
You have a limited supply of energy. You will get tired and slow down when you start to run out of energy. It doesn’t matter how fit or strong you are. It may take minutes or hours, but at some point your energy will run low. Water will never get tired or stop pushing back on you.
Pulling harder and plowing through the water uses more energy than balancing your body and reducing resistance.
Try this; tie your ankles together so your legs sink. Now time yourself swimming 100m. Then untie your ankles and put a pull buoy in and time yourself swimming another 100m. Guaranteed you’ll be faster with the pull buoy in.
For this reason it makes more sense to first learn how to balance your body in the water. Then to learn how to increase propulsion.
Balance & Alignment:
Learn To Walk Before You Run
“Learning to stand up and to be in balance is a prerequisite to learning to walk. Similarly, learning to establish a tight line and to stay balanced while simply kicking is a prerequisite to highly effective swimming.”
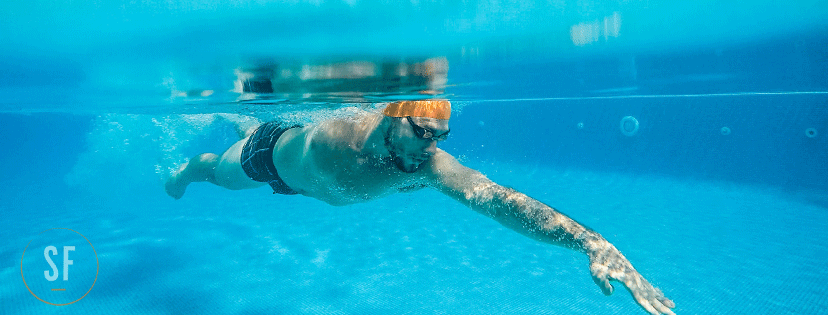
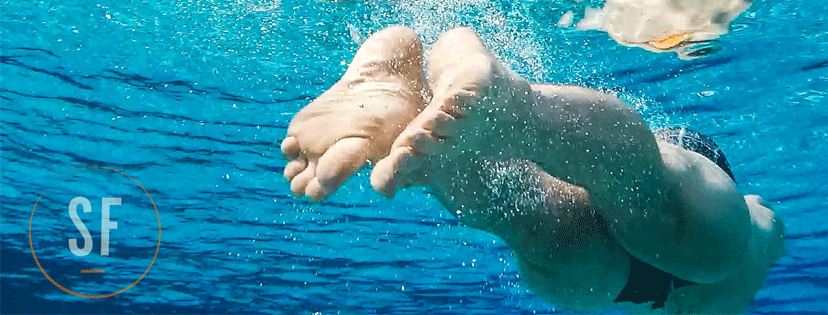
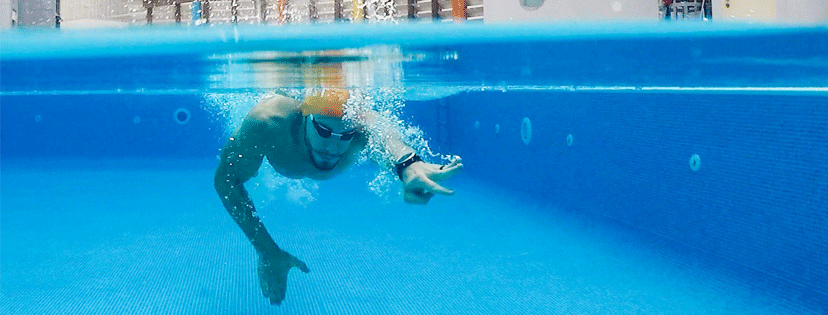
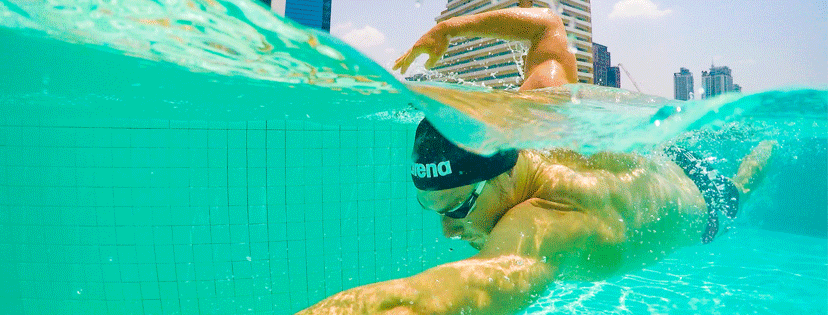
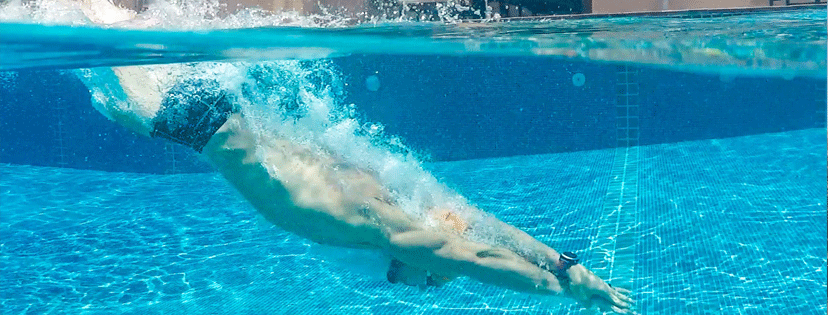
To reduce resistance you must focus on being balanced and aligned.
All this means is that your head, hips heels need to line up with each other – like this:

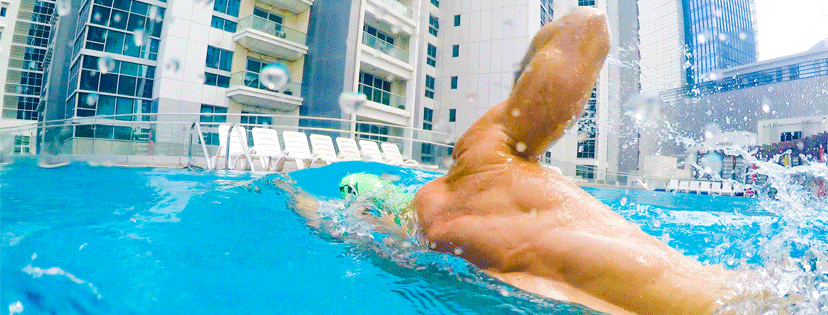
Typically triathletes don’t swim like this.
They tend to hold their heads too high and allow their legs to sink too low – like this:

When you swim in this position you are working against more resistance. As a result it’s taking a lot more energy to move you forward.
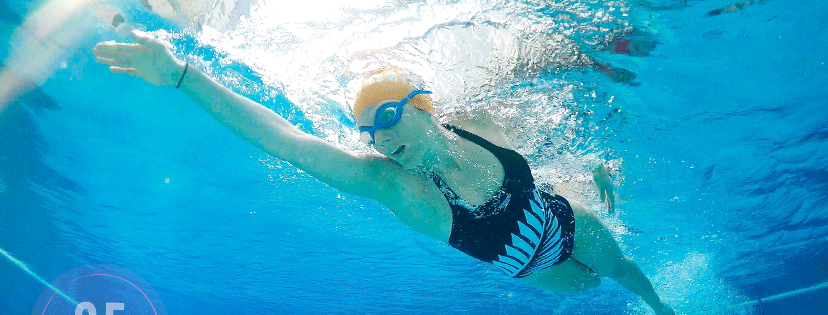
Looking at your body under the water you should be in a straight line from head to toe. To get into this position you need to:
1. Make sure your head is in-line with your spine.
This usually requires you to lower it. There should be no wrinkles in the back of your neck.
2. Relax your neck and shoulders.
Your eyes should be looking straight down at the bottom. You may be able to get away with looking a few degrees in front but your eyes should never look
3. Tighten your core and get your hips up.
Your goal is to have your hips break the surface of the water. Feel the wind on your butt!
4. Kick.
Just enough to raise your legs up to the surface of the water and stop them sinking.
Your Kick
How To Saving Your Legs For The Run Burns More Energy
“Saving your legs will cost you a lot more energy than you think”
In general, triathletes hold a pretty strong misconception about “kicking”.
The idea that you need to save your legs for the bike and run is a common mistake. The thought process isn’t necessarily wrong per se….
You definitely want your legs feeling good for the bike and run. But by not kicking at all you’ll burn through more energy than if you kick just enough to drive an efficient stroke.
A light kick will raise your hips and legs and give you the stability you need to maintain your balance and alignment. Not kicking at all will result in sinking legs, dropped hips, increased resistance, higher energy expenditure and slower swim times.
I’m yet to come up with a quick and easy way to develop a strong kick. Like many things in life, how well you kick is proportional to the amount of time you spend perfecting it.
But I do have a number of points you’ll want to pay attention to as you work on your kick.
1. Relax your legs.
Unnecessary tension wastes energy. You want your leg to be reasonably straight as you kick, but you don’t want them to be stiff or tense. They need to remain loose. Straight, but loose.
2. Heels on the surface.
You want your heels to be breaking the surface of the water at the end of each upward motion. Heels at the surface means your legs are in line with your hips and your head.
3. Keep the kick small.
As a rough guide, your kick depth should be about as wide as your hips. Measure the width of your hips with your hands, your legs shouldn’t go much deeper than that as they kick down underwater.
4. Get the timing right.
Time the downward kick of each leg with the entry of the opposite hand. So as your fingers on your right hand enter the water, your left leg will be kicking down, and vice versa. This counterbalances your body and keeps you moving forward instead of rolling over onto your back.
Your Rotation
The SNAP that drives you forward
“It’s not a roll, it’s a snap”
It’s common to watch new swimmers swim flat. They’ll only use their arms and shoulders leaving their hips stationary.
This is a highly inefficient way to swim.
Your hips and core contain big muscles. These muscles are much stronger than your arms and shoulders and can generate a lot of power in your stroke. To make full use of this potential power, you want to rotate your hips and shoulders from side to side as you swim.
Aside from the additional power, rotating also:
1. Helps you breathe easily to the side.
Lifting your head forward to breathe creates a lot more resistance than breathing to the side. Rotating helps you get into a good side breathing position.
2. Helps you get better distance per stroke.
By rotating you can take less strokes to cover the same distance. Every stroke saved on the swim equals more energy to use later on the bike or run.
A lower stroke count isn’t always better… Lowering your stroke count while maintaining your pace guarantees you are more efficient through the water. But if a lower stroke count causes you to swim slower then it’s not efficient.
3. Reduces the stress loaded on your shoulders.
Rotating gives your arms the space to comfortably clear the top of the water without putting any extra stress on the shoulder.
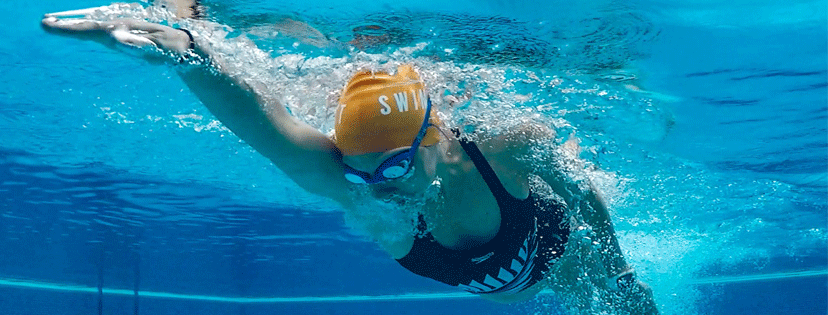
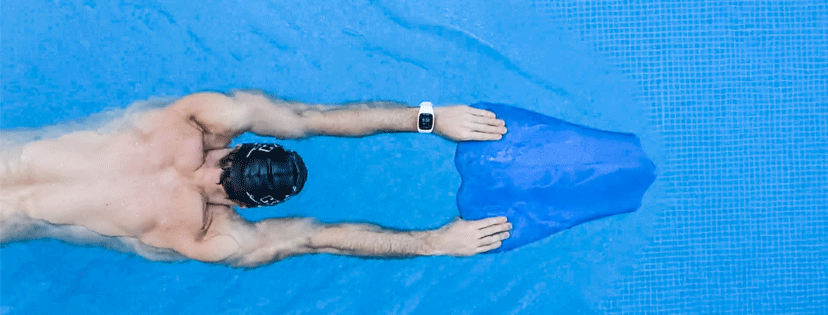
Effective Rotation
Effective rotation is not a slow roll from side to side. Its a quick, powerful snap that drives the hips from left side to right and back again.
Your left hip rotates upwards as your right hand hits the water and extends forward. As your left hip moves up to the surface, your right hip will drop slightly. Then as your left hand hits the water and extends forward your right hip rotates upwards.
The goal is to use the hip switch to help drive you forward as each hand hits the water and extends.
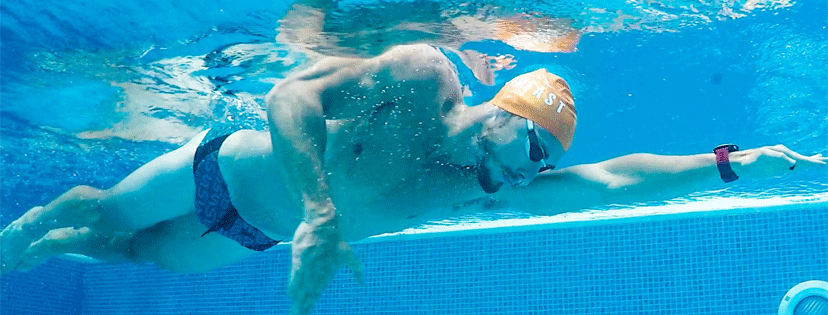
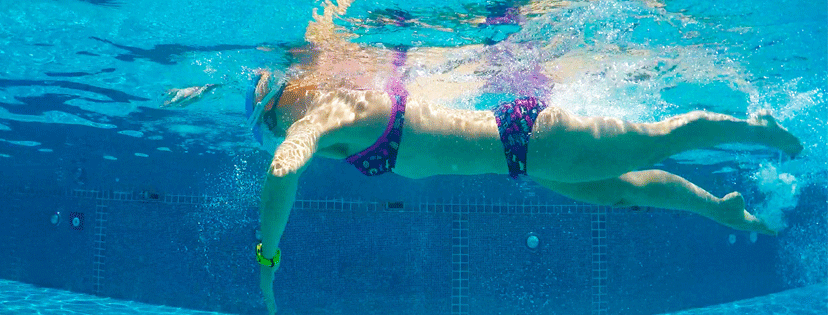
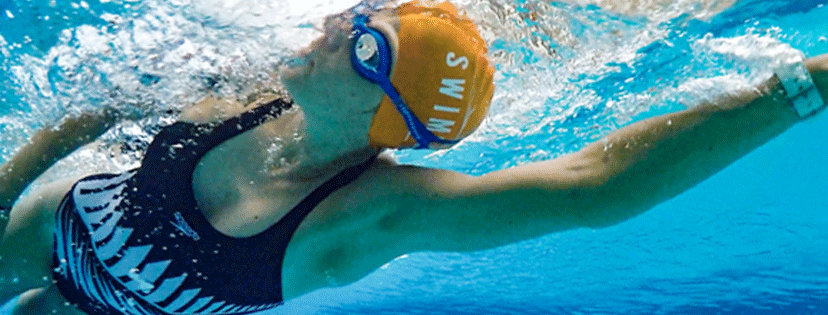
Over Rotating
Over rotating is probably the most common mistake I see Age Group Triathletes make. When you over rotate you come out of alignment which causes you to work against more resistance. You also lose power and momentum which affects your propulsion.
Experienced swimmers can rotate up to 45 degrees relative to the surface of the water. With limited flexibility and feel for the water, I’ve found that most Age Group Triathletes are better suited to rotating between 25-35 degrees.
The goal is to use the hip switch to help drive you forward as each hand hits the water and extends.

Notice how the left shoulder is dropped beneath the surface of the water. He is rotated to about 59◦ relative to the surface of the water. Remember, your goal in the water is to move forward. If rotating to 45 degrees costs you power and alignment it will slow your down and so it’s pointless. Rather limit your rotation to 25-35 degrees and get most of the benefits of rotating without losing out on power or braking your line.
Your Pull
Step by Step Instruction from Catch to Recovery
“The “sexy” part of freestyle!”
This is where most triathletes I meet want to spend a majority of their technique time working on.
If you jumped straight to this section without reading anything I write about resistance and propulsion above I want to re-iterate a point I make earlier.
While you can make substantial speed gains through an effective underwater catch and pull, reducing resistance is your first priority.
The narrower the path you cut through the water, the faster you will swim. You can have the perfect catch and pull but if you swim with sunken hips and a lifted head you’re still going to swim slowly.
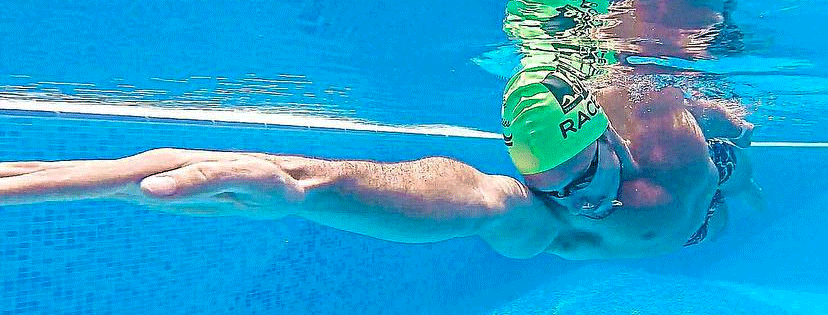
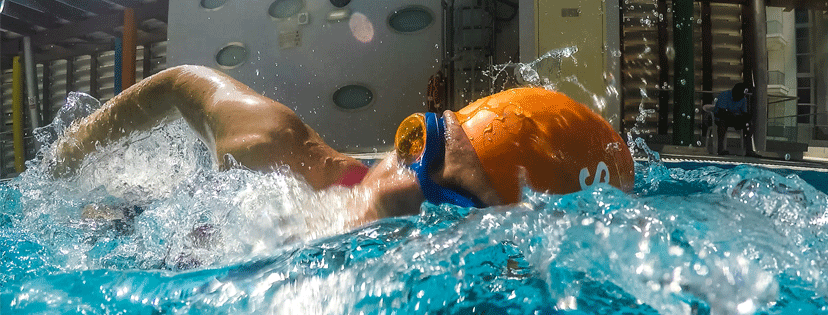
1. Recovery & Setup
“High Elbow Recovery”
Ideally your elbow should be the first thing that exits the water when your hand reaches your hip.
Your elbow should lead the recovery over the top of the water and remain the highest part of your body as you recover your arm.
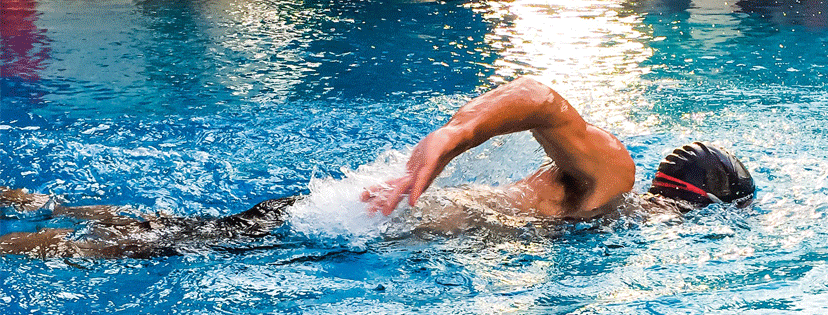
Notice how the elbow came out the water before the hand and how it is the highest part of the body as it recovers over the water. As you recover your arm, think about carrying your elbow out past your ear before your hand enters the water.
If you have limited flexibility in your shoulders this recovery style may not be possible.
If you can’t keep you elbow high through the recovery, don’t stress. Just keep your arm relaxed as it recovers over the water. As long as you aren’t swinging way out wide or your hand isn’t flying out over the top you’re going to be ok.
2. Hand Entry
“Fingers First”
To get the entry right, your finger tips should enter the water first. Followed by your palm, then your wrist, forearm and finally your elbow.
To enter like this, you need to get your elbow high on the recovery. That will allow you to “spear” your hand into the water before stretching out. 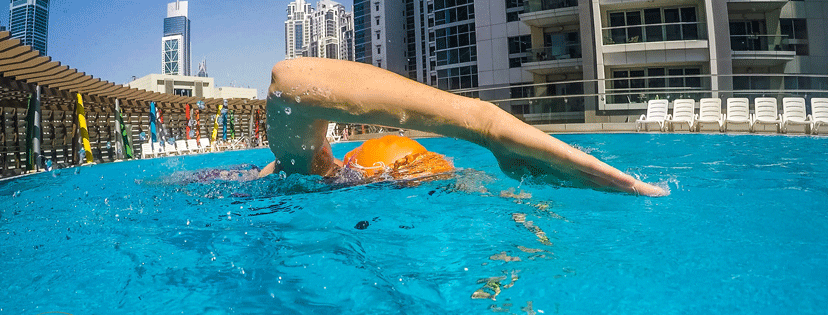
No one’s entry is ever going to be exactly the same. Just as your flexibility will affect your recovery it will also affect your entry.
If you aim for about a 30◦ angle of entry you should enter cleanly while still being able to drive the hand forward after it hits the water.
A steeper angle of entry (like 45◦) can result in you entering too close to your head. This drives more energy downward instead of forward.
A flatter angle of entry (less than 30◦) is better than a steep angle but isn’t particularly efficient.
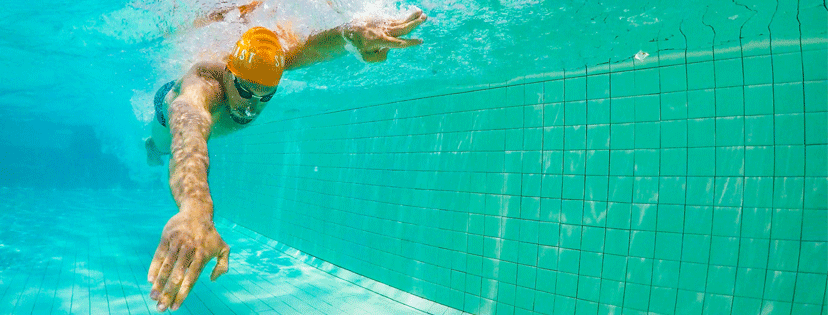
3. Extension
“Drive Forward”
After your hand enters the water your goal is to drive forward. As you drive forward you’ll extend your arm; stretching out powerfully in the direction you are moving.
Before you get into the catch you’ll want to hit “full extension” with your arm.
Imagine you are reaching for something on the top shelf of a cupboard… With your hips are square on, pointed straight at the cupboard you can’t reach the top. BUT, if you stretched your lats as far as they could go… Locked out your elbow… Rotated your hips a bit.. and got on your tippy toes you’d be able to reach a little higher… That’s full extension!
Reaching full extension with each stroke in freestyle lengthens your body. When it’s done well it’ll almost feel like you’re flying!
Over Gliding
As with rotation there can be too much extension in a stroke. We call this “over gilding”.
When you over glide you lose momentum and have to re-generate your speed with each subsequent pull.
Your hand should never be “floating” or “dangling” out in front of your body. It should either be driving forward and actively extending, or it should be moving into the catch position. If its just hanging out in front, you’re over gliding.
4. Catch.
“Get a propulsive grip on the water”
The catch sets up an effective pull.
Miss the catch and you’ll end up pulling without any traction. That’s like the swimming equivalent of tires spinning on the road, burning gas and rubber without the car moving forward!
The catch is the point in your pull where you first get a propulsive grip on the water. It’s the point where you feel pressure, the sensation that you have something to push back against!
The earlier you can get into a good catch position where you have a propulsive grip on the water, the better. You’ve probably heard the term “Early Vertical Forearm (EVF)” or “High Elbow Catch”. This is all it’s referring to.
The catch is important in your pull because in order to move forward we have to push water backwards. The more water we push backwards the faster we go (as long as we are in a good balance position).
Going faster is the goal, so we want to find the biggest “paddle” we can to push water backwards with. Your hand is a nice big paddle…
But your hand, wrist and forearm working together as one “paddle” is even bigger and better.
Your goal is to get this hand-wrist-forearm “paddle” to push water backwards (not downwards) as quickly as you can.
4. The Pull.
“Drive water backwards”
Once you have established a great propulsive grip on the water during the catch you want to drive as much of that water backwards as possible, shooting you forwards as result.
To drive yourself forwards with the most propulsion there are a couple things you should focus on:
1. Push the water towards your feet.
If at any point during your pull you push water in any direction other than towards your feet, you’re wasting energy, losing power and potentially slowing yourself down. To move forward you must drive water backwards, making sure you are pushing the water straight back towards your feet.
2. Accelerate as you move through the pull path.
The catch will be the slowest part of the movement (although you should be aiming to make this as quick as possible) and the finish of the stroke will be the fastest part. Accelerate through the pull.
3. Finish the stroke.
Power your stroke all the way through to your hips. As you get tired it’ll get really tempting to pull your hand out the water at your belly button or to slow your arm down as it gets to the end of the stroke. Focus on finishing and accelerating your hand all the way to you hip with every stroke! The acceleration through the stroke will help you move further forward with every pull – increasing your efficiency and helping you swim faster!
Your Breathing
Getting to the Root Cause of Your Breathlessness
“Oxygen is king”
Breathing is generally the first hurdle that any adult onset swimmer will come up against. Swimming would be easy if it wasn’t for the breathing!
99% of breathing problems are linked to three root causes:
- Fear & anxiety (psychology)
- Poor balance and alignment (positioning)
- Incorrect pacing (fitness)
Let’s look at each, one at a time.
1. Overcoming Fear & Anxiety.
The best cure for fear and anxiety is exposure. It’s time to face your fears.
Triathletes with the biggest breathing struggles have generally had very limited exposure to the water or have gone through a traumatic experience involving water at some point in their lives. If that’s you, your body and brain will be in a heightened state of stress every time you get in.
Firstly, recognize that it’s ok. The fear & anxiety are protection mechanisms designed to keep you alive. It’s normal to feel uncomfortable and scared when you can’t breathe with your face submerged.
Next, let me reassure you. It is possible to learn how to completely relax and get comfortable in the water. Learning to relax, stay calm and breathe easy will come through exposure.
The more experience you get in the water, the more comfortable you will get. Some people take longer than others, but I’ve never had a client that hasn’t overcome their fear and anxiety with time and consistent exposure. Without getting too philosophical, time heals everything!
2. Overcoming poor balance and alignment.
If your hips sit too deep beneath the surface when you try to turn your head for a breath you won’t be able to get your mouth out the water. As a result you will lift your head up for the breath or over rotate and look up to the sky as you breathe. Both of which result in slowing you down.
3. Fixing your pacing.
Often times when I get feedback about a swimmer struggling to breathe it simply comes down to trying to swim too fast for the distance you want to cover.
We’ll discuss this in detail in the next section, but for now I’ll explain it like this.
Think about your 5k pace vs your marathon pace. They are not the same! More often than not triathletes only have one pace in the water and it tends to be more of the faster 5k pace than the slower marathon pace!
Make an effort to swim slowly. As slow as you actually can without sinking. See how far you get before you lose your breath. I’m confident you will be able to get through more than a lap or two before you need to rest.
You’ll quickly find that you can build speed off of your new found endurance (which will come as you swim at a slower pace).
What you’ve probably already discovered is that you can’t build endurance off of speed! So force the go-slow and build up a little endurance, the speed will soon follow, I promise!
1. Don’t hold your breath underwater.
Exhale continuously in a controlled manner through your nose and mouth while your face is submerged.
Learn to exhale fully. Don’t hold onto the carbon dioxide that’s building up in your lungs, get rid of it!
2. In through your mouth, out through your nose.
Breathing out through your nose stops water going up your nose (which is no fun!) – water can’t go up if the air’s coming out! But the flow is also rhythmic and can be synced up with your stroke.
3. Breathe more frequently.
Bilateral breathing is the downfall of so many new swimmers. They believe they have to breathe to both sides to swim well. I don’t believe it is. While breathing to both sides is a very handy and useful skill in open water and in the pool, it’s not foundational to learning to swim effectively. You can build a rock solid stroke only breathing to one side!
4. Don’t panic.
Breathing in a bit of water is absolutely normal. Even the greatest swimmers will take in some water from time to time.
If you find yourself with a mouth full of water, stay calm. First shape your tongue as if you were pronouncing the letter K. This tongue position will stop water from going down your throat. Then just spit the water back out. This happens to every swimmer, you get used to it and better at dealing with it! Just don’t panic.
Swim Fitness
Building Better Endurance
“Be fit or suffer.”
As you may have discovered, bike & run fitness does not equal swim fitness. The ability to ride for hours or run a great marathon will not help you swim fast or efficiently.
Cycling and running performance are primarily dependent on your cardiovascular fitness (your traditional fitness level).
Your triathlon swimming performance is dependent on a combination of cardiovascular fitness and how well you are are able to reduce drag and maintain propulsion (i.e. hold good technique) as you fatigue.
Technique will set the limit on where your fitness will take you. But technique on it’s own will only carry you through 4-5 minutes of swimming. After that you better be fit or you’re going to suffer.
The Swim Goals of A Triathlete
Swimmers fitness and performance is based on finishing the set distance as fast as possible. No matter what the energy cost. When they come out of the water or touch the wall, they are done.
As a triathlete your race has only just begun when you come of the water. Swimming fast only to fall apart on the bike or run is pointless.
Efficiency is king.
You have to be efficient through a triathlon swim – finishing as fast as you can building up as little fatigue as possible.
The most effective way of swimming efficiently is to swim intervals at your “threshold pace”
“Threshold” pace might sound confusing or intimidating but it’s actually very simple. I’ll explain it using an analogy about Mt Everest.
Mountaineers that climb Mt Everest all start at Base Camp. As they climb toward the Peak they pass an altitude line that marks the start of what’s called “The Death Zone”.
The Death Zone starts 26000ft. It’s called the Death Zone because the amount of oxygen available above 26000ft is dangerously low. If a climber spends too much time above 26000ft they risk certain death. Most Everest fatalities happen above 26000ft, hence it’s name.
Think of your swim speed like Mt Everest.

When you swim below your threshold pace you won’t struggle to breathe or feel like your muscles are shutting down.
When you swim faster than your threshold pace you enter the “Death Zone”. Your body is only capable of maintaining its pace in the Death Zone for a very limited amount of time. If you swim in the Death Zone for too long you’ll run out of oxygen, start gasping for air and feel that burning sensation in your muscles.
Common Swim Fitness Struggles for New Swimmers
Let’s apply the Everest analogy to some of the most common complaints I receive from swimmers struggling with their swim fitness.
Common Complaint One:
“For some reason I’m gasping for air after 100m in the pool . I have decent speed but I can’t maintain it and find myself becoming breathless, I get to the wall and need 10-30 seconds to recover.”
I receive emails like this at least 5 times a week. This issue is that common.
The reason you’re gasping for air is because you’re swimming in the death zone. Your body is burning through so much oxygen and energy you can’t breathe fast enough to keep up. If you slowed down to a pace that is below your Death Zone line you’d be able to swim more continuous lengths without needing to stop.
If you feel like you can’t slow down without the risk of sinking, then you need to spend more time doing the Balance Drill. Mastering the Balance Drill means you’ll spend very little energy staying afloat which will allow you to use your energy to move forward.
Common Complaint Two:
“I feel comfortable swimming distances but I just can’t seem to get faster. I swim consistently at 2.00/100m. If I push it I can break 1:55/100m, but those 5 seconds cost me a lot of energy. I want to be stronger and faster in the water, but with a smooth and efficient stroke.”
This struggle is common to triathletes with a year or two’s experience.
The reason you aren’t getting any faster is likely because you only swim at your “Base Camp” all day pace. When I dig a little deeper I’ll often find that swimmers that struggle the most with this problem do a majority of their triathlon swimming training as straight, long endurance swims and do not use intervals with goal times or rest periods in their workouts.
Your body (and fitness) will only strength when forced to work beyond it’s comfort zone. The training you do must be progressively increased in order to bring about progress. This “law” of training is known as “Progressive Overload”.
Training at your Threshold Pace (which should be tested and adjusted every 4-8 weeks) ensures that your body is progressively being forced to work beyond your comfort zone. This is how you get faster while maintaining a smooth and efficient stroke.
Advantages of Swimming At Threshold Pace
1. Little Build Up Of Fatigue.
Your threshold pace will be challenging enough to build solid swim fitness but won’t leave you gasping for breath or too tired for your bike & run workouts.
2. Specific Triathlon Training Pace.
Threshold pace training is specific to “distance/endurance” swimming which is perfect for triathlon. It won’t make you a faster sprinter over 50 or 100m but it will teach you to swim faster over longer distances.
3. Teaches You To Pace.
Using your threshold pace you will develop your awareness of how to pace correctly (no more starting too fast and dying early!).
Your Training Pace
The simple test to determine your goal time
We’ve established that your threshold pace is key to developing your swim fitness as a triathlete.
There are a variety of methods to find your threshold pace. Each method will give you similar numbers. I’m going to explain the method I like best, but you could try out any others if you would like to.
The method I use with my clients is called a “Critical Swim Speed Test” or CSS Test. The CSS test was developed by Dr Enid Ginn in the early 90’s and it’s used by swimmers and triathletes all over the world.
How to complete a CSS Test
- Warm up adequately in the pool so you are ready to swim fast.
- Complete a 400m time trial starting from a push (not a dive) and record your time
- Rest as much as you need after the 400. This should be long enough to fully recover from the 400 and be ready to give an all out maximum effort on a 200m time trial.
- Complete a 200m time trial starting from a push (not a dive) and record your time.
Interval Training
How to create highly effective workouts
Once you have established your CSS Pace you can get as creative as you like with how you use it to create your workouts. There are a couple of guidelines you’ll want to follow, which I lay out below:
1. Intervals
Unlike a majority of your bike and run workouts, your swim workouts should be primarily interval based with short(er) swims with rest periods between each swim. While you should do long, continuous swims from time to time, most of your workouts should be centered around a set of intervals.
An interval is a set or series of short(er) distances repeated a specified number of times over, broken up with periods of rest. Interval distances can each be the same length or vary in length.
2. Rest Times
After completing the set interval distance you will rest before starting the next interval. Rest times can be tweaked and adapted but as a general guideline, for a CSS set we rest 10 seconds for every 100 you swim.
Example Threshold Sets
Lets’s look at an example:
Say you are training for a Olympic Distance Triathlon and plan to do a 1500m workout. Instead of doing a continuous 1500m you could do one of the following interval sets:
1. Workout One:
15 x 100 @ CSS Pace
Take 10 seconds rest between each 100
2. Workout Two:
1 x 500 @ CSS Pace – Rest 50 seconds
1 x 400 @ CSS Pace – Rest 40 seconds
1 x 300 @ CSS Pace – Rest 30 seconds
1 x 200 @ CSS Pace – Rest 20 seconds
1 x 100 @ CSS Pace
Both workouts equal to 1500m and both will help you prepare for your Olympic Distance swim far more effectively than swimming a straight 1500m.
Planning Appropriate Workouts To Your Ability
If you looked at either of the 1500m sets I wrote out and felt intimidated, do not fear. Done correctly neither of those workouts are easy by anyone’s standards – even great swimmers.
The beauty of CSS Pace training is that you can scale and adjust your workouts to your needs. Because your CSS Pace is based off YOUR CSS Test you know that the goal times are appropriate to your ability and current fitness level. This makes it highly personalized and specific to your needs.
Here are three scaled down versions of the above workouts for a swimmer that doesn’t yet have the confidence or fitness to do a full 1500m CSS Set
1. Scaled Workout One:
6 x 100 @ CSS Pace
Take 10 seconds rest between each 100
2. Scaled Workout Two:
1 x 300 @ CSS Pace – Rest 30 seconds
1 x 200 @ CSS Pace – Rest 20 seconds
1 x 100 @ CSS Pace
3. Scaled Workout Three:
1 x 300 @ CSS Pace – Rest 30 seconds
3 x 100 @ CSS Pace – Rest 10 seconds between each 100
Warm Ups
Before starting a CSS Pace set you always want to make sure you are warmed up. A good warm up will ensure that you:
- Are comfortable in the water
- Have redirected blood to the muscles you are using (minimizing your risk of injury)
- Set up good stroke habits
Not warming up is a rookie mistake you want to correct. From time to time I will have my triathletes do a Race Pace swim without a warm up. Every time I do, they come back to me with quotes like this:
“At first I thought great, 400 on fresh muscles this should be fast and simple. Not the case. I finished in the same time as my last test but, my shoulders sure felt the burn earlier on. Shows how little I really know and how import the warm up is. Quite the eye opener.”
You must get a good warm up in at the start of you workout! As a general guide, your warm up should take up about 10%-25% of your total workout time.
Hitting a Threshold Plateau
If you have been consistently training at Threshold pace but still feel like you are stuck at a plateau, there is one of 3 reasons why:
1. Your goal paces are incorrect.
Solution: Retest your Threshold Pace. Work off your new pace and see if you break through the plateau.
2. You are not swimming consistently enough.
Solution: Swim a minimum of 3x per week for a month and see if you break through the plateau. Already doing that? Add an extra swim workout every week.
3. You have a fundamental technique problem.
Solution: Remember, technique will set the limit on where your fitness will take you. If it’s a technique problem, get a video analysis done to identify what’s holding you back.
Balancing Technique & Fitness
Making the best use of your time
Combining great technique with solid swim fitness is your key to triathlon swimming success. But how much should you be doing of each?
Focus on technique in the off season or in the early part of your season. Use the time when you don’t have a looming race to refine your skills with technique work. As your priority race gets closer the amount of time you spend on technique will get smaller as your training sets get bigger.
Beginner Swimmer
- 20+ Weeks out from your priority race technique work can take up 75% of your total workout time.
- 12-20 Weeks out from your priority race technique work should take up 50% of your total workout time.
- 12 Weeks and Less out from your priority race technique work should take up 30% of your total workout time.
Experienced Swimmer
- 20+ Weeks out from your priority race technique work can take up 60-75% of your total workout time.
- 12-20 Weeks out from your priority race technique work should take up 40-50% of your total workout time.
- 12 Weeks and Less out from your priority race technique work should take up 10-20% of your total workout time.
These are very rough guidelines and will be heavily dependent on where you are in your progression as a swimmer and what your goals are. Two things should be clear to you looking at these guidelines:
1. The earlier you start, the better off you will be!
As your priority race gets closer the amount of time you spend on technique will get smaller as your training sets get bigger.
2. We work technique & fitness in every workout.
Regardless of your triathlon swimming ability. If you can’t swim well, don’t ignore your fitness and focus on technique only. If you are a seasoned swimmer, don’t ignore your technique (and the bad habits you’ve picked up) but focusing only on your fitness.
Open Water
Growing Unshakable Confidence
For a variety of reasons, a majority of your triathlon swimming training will happen in a pool. This is not a bad thing. Practicing in the pool is practical. It is also more effective when you want to develop your technique and build your swim fitness.
But in nearly every triathlon race, the swim happens in open water.
So your ability to transfer what you do in the pool into open water will determine how successful you are.
First things first; water is water.
The fundamental principles we’ve discussed to this point apply to both the pool and open water. But there are subtle adjustments that you must make and practice in the open water to ensure success on race day.
Here are my guidelines for making the transition from pool to open water smooth and effective.
Sighting
The easiest way to swim the shortest distance
If you don’t swim in a straight line you can easily add 10-20% to the distance you swim. In an Ironman distance swim, that’s 400m+!!
It doesn’t matter how fast you are, if you swim further than you need to you will finish with a slower time. Swimming a straight line is the easiest way to improve your swim time on race day.
Increasing the frequency of your sighting strokes is the easiest way to make sure you stay on course. Most triathletes don’t sight enough.
As a guide you should be practicing to sight ever 6-12 strokes during your race swim. This can vary on conditions and your experience but the 6-12 range will cover most AG triathletes.
Frequent sighting will help you swim straight, guaranteed. But if you’re not sighting correctly, lifting your head can increase drag. Recall the technique section where we talked about how lifting your head causes your legs to sink which results in extra drag. If your sighting technique is not correct, the more you sight, the more susceptible you are to sinking hips and working against extra drag.
Sighting is a technique skill that you must practice regularly during your pool and open water swims. Here is how to sight correctly and stop your hips from sinking:
1. Keep your head low.
Lift your head only as high as necessary to sight – think of how a crocodile peers above the water. Only your eyes need to come up, not your whole head
2. Sight then breathe.
Do not breathe while looking forward. Separate your sighting and your breath. Sight forward then turn your head to the side for a breath. Sight then breathe.
3. Arch your back.
Arch your back while lifting your head so your legs and feet stay up near the surface to limit your resistance.
4.Accelerate your kick.
Kick a little harder while your head is raised to keep you balanced.
Swim With People
How to prepare for the Race Day “Washing Machine”
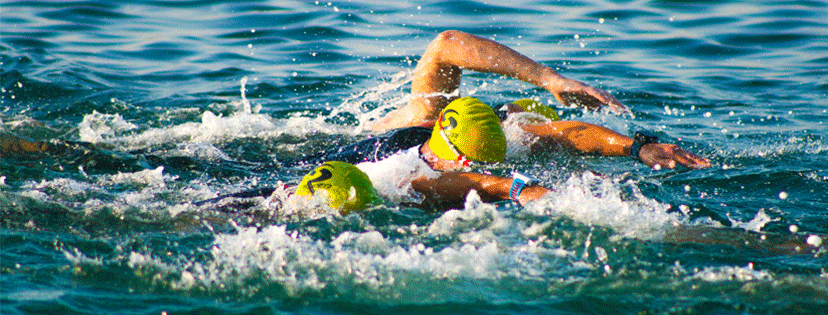
If you want to transfer your speed from the pool to open water you have to learn to deal with swimming in a crowd or a pack.
If you swim by yourself, choose the busiest lane to complete your workout in. Or purposefully swim at the busiest time of day at your pool. It will frustrate you and irritate you, but you will learn to deal with it before it happens on race day.
If you swim with a group, practice swimming side by side, or in a line behind each other. Get comfortable being in close proximity to other swimmers.
Another great way to practice this is to race open water swim races or swim on a Tri Relay Team.
The more practice you can get with swimming in a crowd the better prepared you will be on race day. To help prepare my triathletes we will race an Open Water Swim Race in the weeks leading up to their race. We treat these races as open water training days. Time and results are not important, but the experience gained is invaluable.
Open Water Practices
Fail to prepare, prepare to fail

You will experience things in the open water that you don’t think about in the pool.
Here is a short list:
- Sun
- Weeds
- Waves
- Currents
- Deep water
- Murky water
- No wall to rest on
- Being far from the shore
- Fear of lake zombies and sharks
]How you deal with any of these variables will come down to how experienced you are with them. Experience comes through practice.
The more you practice in open water, the better you will get at handling the variables that you will face in triathlon swimming.
The simplest way to prepare
- If you will be racing in a fresh water lake, get into a lake.
- If you will be racing in the ocean swim, get out into the ocean.
- If the water will be cold and you’ll need a wetsuit, find water that is just as cold.. and get in!
Your Wetsuit
How To Choose Your Wetsuit & Getting Comfortable In It
Most triathletes LOVE their wetsuits. But swimming in a wetsuit can feel very different to swimming without one. The first time you put yours on (ever or after a long break) it may feel a little weird.
Your highest priority when looking for a wetsuit is comfort and fit. Your wetsuit must fit you correctly!
If the suit is too tight, too loose, or uncomfortable in any way it’s going to affect your swim. A poor fitting wetsuit will:
- Make you slower
- Change your stroke mechanics
- Fatigue your shoulders faster
- Put extra stress on your breathing
- Put extra stress on your neck and back
- Cause you to carry more water on your body
A few things to consider when buying a wetsuit
1. Your Shoulders.
A suit that fits you well should allow good range of motion in your shoulders.
2. Your Reach.
It should allow you to stretch fully through your lats without feeling restricted.
3. Your Breathing.
You should be able to breathe deeply in and out. Without it altering or restricting the movement of your chest.
The perfect wetsuit will fit like a glove, nice and snug but not too tight.
Finding the best fit for your body and your stroke mechanics before you buy is so important. In fact, I tell my athletes not to buy a wetsuit they haven’t been able to test first.
There are some retailers/distributers that will allow you to test or rent a wetsuit before you buy it. And by test, I mean actually swim in it.
The brand or suit is a minor detail in comparison to fit. Today, most of the suits in the mid to upper end offer similar benefits (buoyancy and warmth). Your priority is finding what works best for your body and stroke.
Once you have your suit, your need to get in enough practice time prior to race day. You must be completely comfortable in it.
Ideally you’d test it in open water conditions similar to the ones you’ll be racing in. If that isn’t possible, at least get some practice in during your pool swims.
Swim Confidently
The Mindset of a “Front of the Pack Swimmer”
I have a client that comes from a very competitive marathon running background. She was struggling with people bumping her during the swim start in each or her races.
One day I asked her how she dealt with the massive crowds that fill narrow streets at the start of most marathons. She told me she simply picks her line and runs it with confidence, if she makes contact with someone, so be it.
Then the penny dropped.
From that day forward she approached her triathlon swim starts the same way. She picks her line and swims it with confidence. Contact is bound to happen, but she can handle it, and so can you!