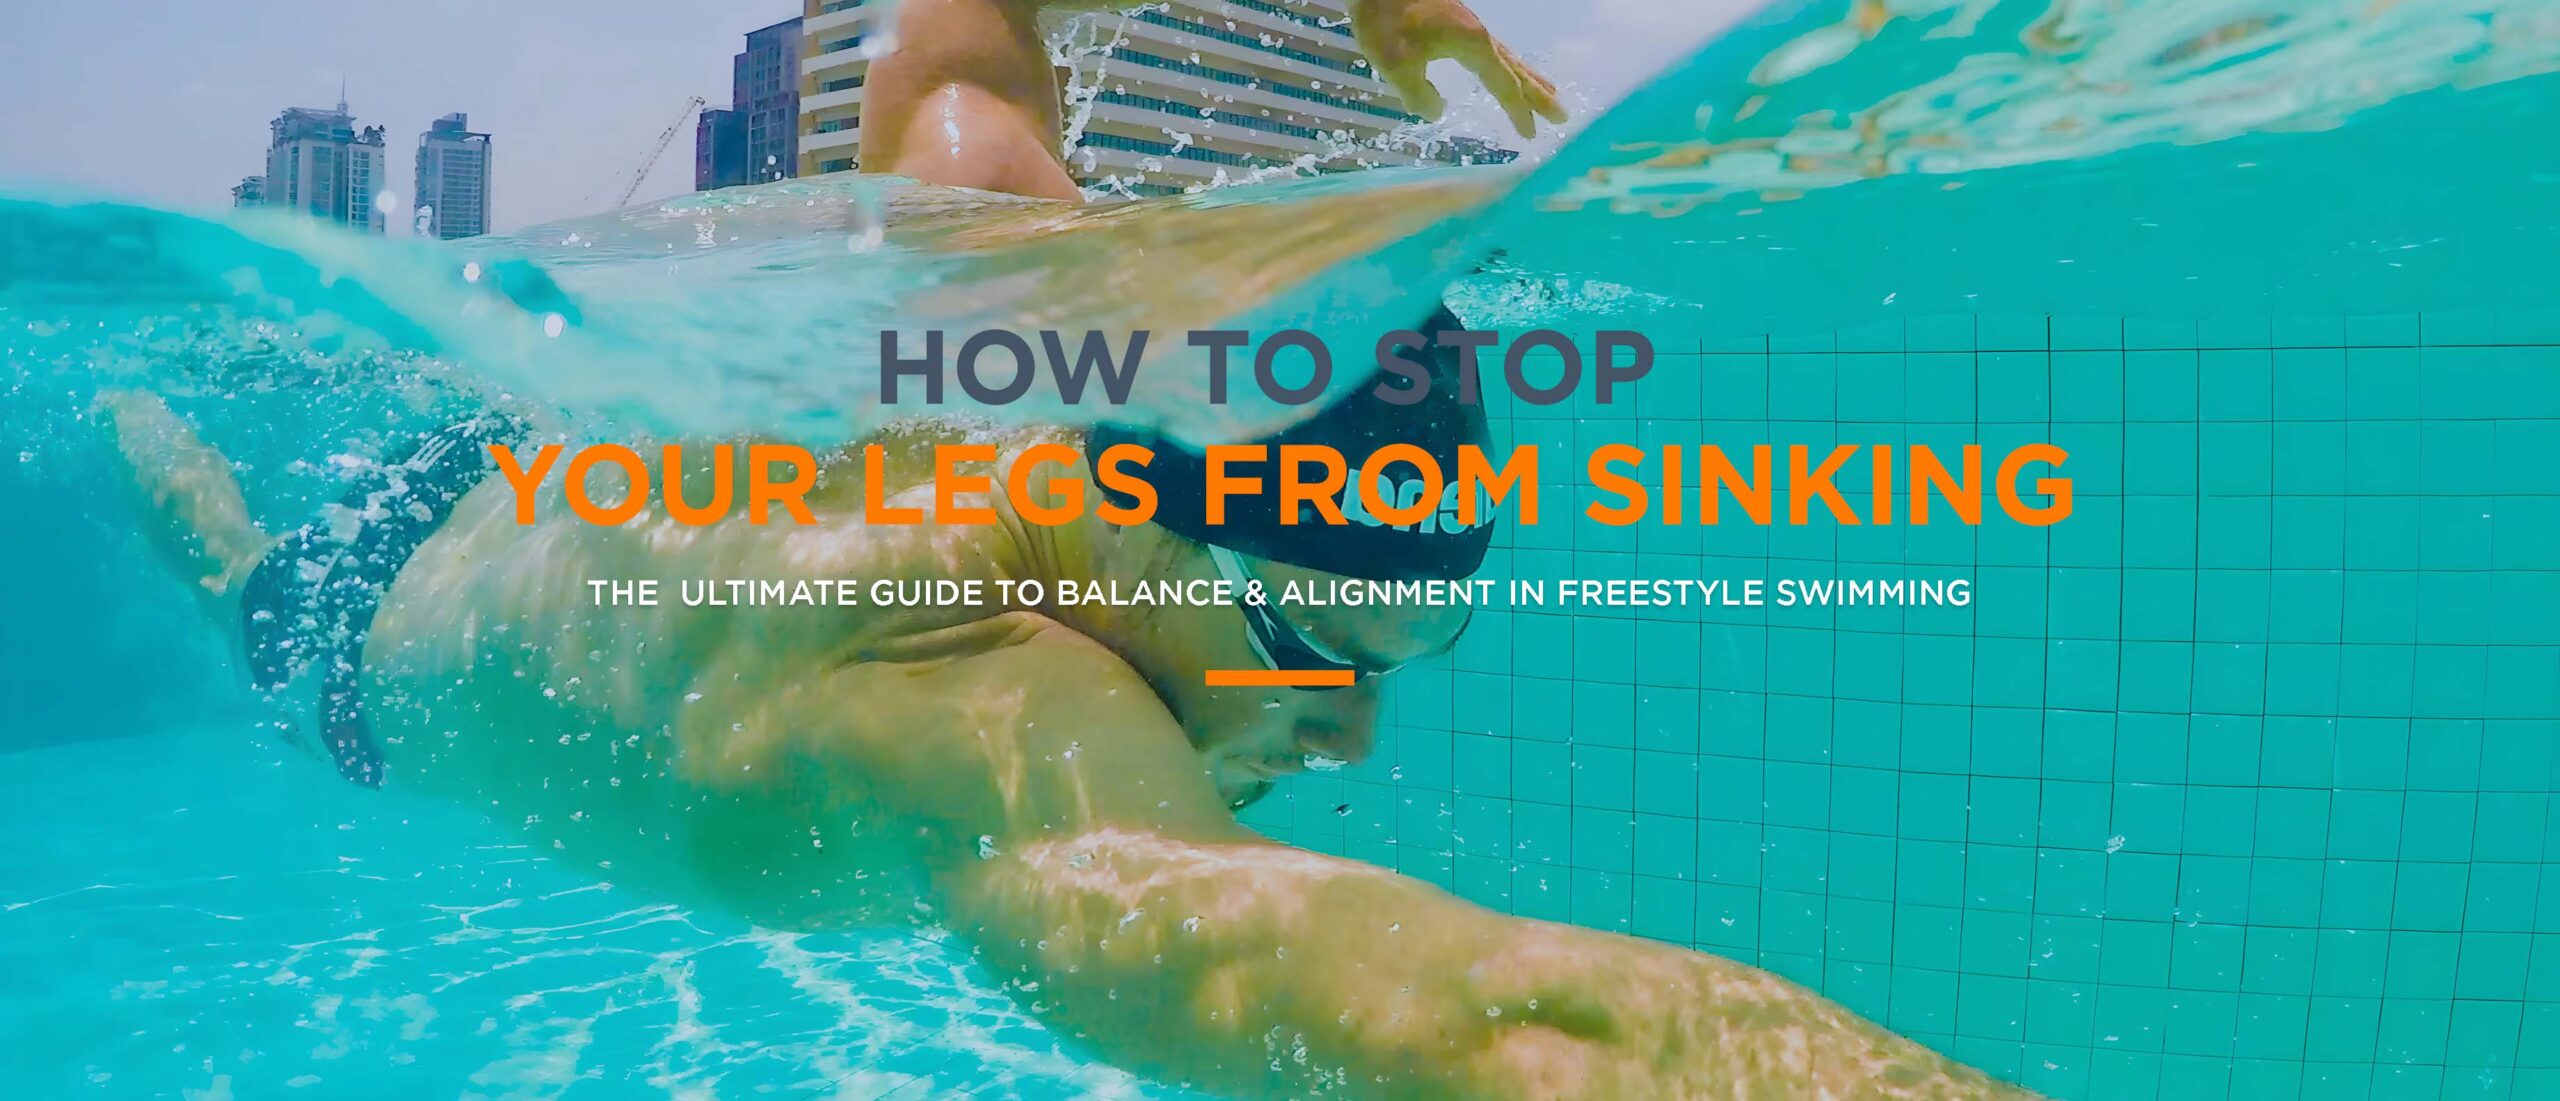

The Ultimate Guide To Balance & Alignment In Freestyle Swimming
Introduction
Stopping your legs from sinking doesn’t just magically happen.
The human body isn’t designed to float horizontally. Honestly, I don’t even think we were created to swim. Sinking legs is a problem practically every human faces when first learning to move through the water.
The fact is, our legs naturally sink. Keeping them up and afloat takes body control and skill. You have to learn to manipulate the forces at play to get your head, hips and heels aligned.
I’m assuming you picked up this guide because you want to know how to stop your legs from sinking.
I think that’s awesome.
It immediately tells me that you have your priorities right. Getting your alignment right is the key to faster, efficient swimming.
Don’t believe me?
Why do you think so many triathletes love their wetsuits? Why do I see so many age groupers swimming with pull buoys between their legs, all the time?
Because the wetsuit, the pull buoy & the buoyancy shorts all stop your legs from sinking! And as a result you can swim faster for longer.
If you are a runner or a cyclist transitioning into triathlon, I’ve written this guide for you.
If you’re struggling to balance out your body. If swimming a length or two exhausts you and you can’t swim without having to stop. If you want to cope better with non wetsuit legal swims. I have written this guide to help you too.
This is my attempt to teach you how to balance your body and align yourself in the water. It brings together all my knowledge on the topic. The 12,000+ words in this guide cover a lot of what I have learned from years of coaching triathletes and hours of studying them swimming. The videos and practical tips come from many late nights watching and analyzing the strokes of people just like you.
In this guide, you’re going to learn why your legs sink and the root causes of sinking legs that I see most often. I’ll show you how to address and fix each issue and answer the most common questions I get asked.
Who Am I?

My name is Rory, I write and record everything on ICanSwimFast.com. My goal with SwimFast is to build confidence, skill and efficiency in Swim weak Age Group triathletes through simple stroke instruction, tailored 1-1 programs, and in depth video analysis.
I’ve worked to make this guide comprehensive. But I’ve
been around long enough to know that I don’t know everything. So if you have questions or you’re struggling
to understand something, email me – rory@icanswimfast.com
Now grab your gu brew. Pull up your compression socks. Crank up the Normatec boots and let’s get to making you a faster, more efficient swimmer.
How Body Composition Affects Floatation
Have you ever said:
“I lack the natural ability to float and so I tire quickly.”
“My bone density is unnaturally heavy so I can’t swim very fast”.
“I have below average buoyancy so I can’t swim well.”
If you’re using “natural flotation” as an excuse for your lack of progress in the water, you’re misguided. And I want to start this guide by showing you why.
I’m not going to be an asshole about it. I have worked with thousands of runners and cyclists that struggle with this. If anything, I am extremely empathetic to how difficult learning to float and balance in the water can be.
But, your body composition is not a limiter on your ability to swim fast. Your technique, or more specifically, your ability to get into and hold the correct position is.
Yes, your body composition does play a role in how well your body floats. But your “floatability” does not affect your swim potential. At least not at the AG Triathlon swimming level.
Stick with me as I explain why. There are some numbers involved but I’ve kept it simple and it’s worth your time to understand:
――――――――――
Floatability.
We measure floatability using something called a specific gravity ratio (sp gr)*. The lower an object’s sp gr (specific gravity ratio) the better they float.
Water has a sp gr of 1.00, the average human body has a sp gr of 0.974**. All this means is the average human body is less dense than water. And that means most of us humans can float to some degree.
- *Specific gravity is the ratio of the density of a substance to the density of a reference substance (https://en.wikipedia.org/wiki/Specific_gravity)
- ** https://onlinelibrary.wiley.com/doi/pdf/10.1111/j.1469-1809.1935.tb02118.x
Despite the body (as a whole) having a lower sp gr than water, only a small percentage of tissues in the human body floats very well.
――――――――――
What Floats?
Lungs:
The only real floatable part of the human body is the lungs.
Your lungs are like two big bags in your chest that fill with air, like balloons. The bigger your lung capacity, the more air you hold in your chest and the higher your upper body will float.

Your lungs are the most important part of the floating equation. Without your lungs your body (and mine) would sink like a rock. I’ll demonstrate that for you in a bit…
Fat:
Fat also floats. Fat has a lower sp gr than water. So the more fat you carry on your body, or rather the higher your body fat percentage is, the better your natural float-ability will be.
――――――――――
What Sinks?
Pretty much everything else in your (and my) body.
Your bones, muscles, and other tissues found in the human body all sink.
Bone density and lean muscle mass have a negative effect on your floatability. Athletes with heavier bones and more muscle will have a higher sp gr. The more muscularly dense you are, the higher you sp gr and the faster you will sink.

In my 18 years of coaching I have worked with people that have an overall sp gr higher than 1.00. These people do not float naturally. People that sink do exist, but having a sp gr higher than 1.00 is less common than you think, and it’s likely you aren’t one of them. Of the thousands of athletes I’ve worked with, an overwhelming majority float when they are taught how
This guy floats – if he does, chances are, you will too!
In my experience, 99.5% of people have a sp gr lower
than 1.00 and float just fine. They just have to learn how.
How To Test Your Natural Floatability
I define natural floatability as the following:
“How well your body floats as determined by your body composition.”
The simplest way to test your natural floatability is the Mushroom Float.
The Mushroom Float Test

Here are the steps to do a mushroom float:
- Do the test in the shallow end of the pool where you can stand.
- Take a deep breath in and then hold your breath.
- Lift your feet up off the floor and lower your head into the water
- Tuck your body into a ball, bring your knees up to your chest and hold your shins with your hands.
- When you need to breathe, stand up.
The test is very simple. But to get accurate results, it’s important that you perform the test correctly.
{1} Make sure you take a deep breath in.
- Fill up your lungs with air before you lift your feet and drop your head into the water.
{2} Relax your body as much as possible.
- You can swing the results by tensing up. Being tense suggests your floatability problem isn’t body composition, but rather mindset or fear.
{3} Don’t wear heavy clothes.
- You will increase your sp gr by wearing board shorts or heavy clothes. Do this test in swim wear that isn’t baggy and doesn’t collect water. Time to bust out the budgy smuggler.
The mushroom float is an unbiased test of your natural floatability as determined by your body composition. If you don’t fill your lungs, or you tense up or wear heavy clothing you swing the results. You aren’t testing your actual floatability.
When this test is done correctly, 99.5% of people will float up to the surface within seconds of tucking up into a ball.
My suggestion is that you try the Mushroom float test a few times.
{1} First, prove that you actually float naturally.
{2} Then, try exhaling while you are tucked up in the ball.
When you exhale, you will probably sink.
This is because your lungs are the only part of your body that actually floats. When you empty them, you sink. Your pelvis and femurs along with your glutes, quads and hamstrings make your legs very heavy. With no air in your lungs, your hips and legs pull your body under.
There’s a reason that the mushroom float position keeps you up on the surface. Even though your legs are heavy, the tucked position changes the way forces that act on your body in the water. In the next section we’re going to take a look at those forces.
――――――――――
Forces
Whether you fit into the 99.5% of people that float or the 0.5% that sink, one fact is constant for everyone. Your chest floats better than your legs.

There are two forces responsible for your floaty chest and sinky legs.
{1} Buoyancy which is an upwards force.
- It supports or pushes up on your body and causes you to float
{2} Gravity which is a downward force.
- It pulls down on your body and causes you to sink
For you to float up on the surface of the water, the force of buoyancy must be greater than the force of gravity.
Where Gravity > is greater than > Buoyancy; You Sink 😠
Where Buoyancy > is greater than > Gravity; You Float 😊
The force of buoyancy is strongest around your chest. Because of your lungs, your chest has the lowest sp gr in your body. It is the least dense part of the body. This is where the force of buoyancy is strongest so we call the chest your center of buoyancy in the water ^1
The force of gravity is strongest around your legs. Your legs have a higher sp gr than water, so the force of gravity is strongest through your legs.
The way gravity acts on your body is a little weird. There isn’t one specific spot gravity pulls down through. Unlike buoyancy, which always pushes up through your lungs, the force of gravity
can shift. The exact location gravity pulls through will move based on your body position. It generally pulls down through the area of your hips. But it can move up towards your belly button or down toward your knees, depending on how you are positioned. We call the point that gravity pulls down through the “center of gravity” ^2
To float, the center of gravity and the center of buoyancy must align. Gravity must pull down in exactly the same line as buoyancy pushes up. With both forces pushing and pulling in the same place, you float level.
This is why you float in the tuck of the mushroom float. During the mushroom float test, your legs sit underneath your lungs. So your center of gravity and center of buoyancy line up, one on top of the other. As a result you bob up to the surface.

As you stretch out your legs, the center of gravity begins to move down towards your feet. The further the center of gravity moves from the center of buoyancy, the faster your legs sink.
――――――――――
The Dead Man’s Float
We now know the center of buoyancy always pushes through your chest. And we learned that the center of gravity pull shifts as your body position changes. The Dead man’s float demonstrates this for us very nicely.

Here are the steps to do a dead man’s float:
Phase 1:
{1} Begin with a mushroom float by
{2} Taking a deep breath in and then hold your breath
{3} Lift your feet up off the floor and lower your head into the water
{4} Tuck your body into a ball, bring your knees up to your chest and hold your shins with your hands.
{5} Once you’ve floated up to the surface, release your legs and begin to extend them out behind you
{6} Notice how your legs sink as you open up your body
{7} When your legs have stopped sinking or you run out of breath, stand up
Phase 2:
Repeat the test again. The second time you do it, as you extend your legs out behind you, stretch your arms out in front of you at the same time.
What we see in Phase 1 of the dead man’s float is that your legs sink no matter what. The legs have a higher sp gr than your chest and the water so they sink faster!
Nearly every adult’s legs sink when doing the dead man’s float.
Mine absolutely do!
As you stretch out the center of gravity begins to move down towards your feet. The further the center of gravity moves from the center of buoyancy, the faster your legs sink.

In all my years coaching, I’ve only had a handful of people that can float in this horizontal position (without kicking). The sp gr in their legs is lower than water and they are able to balance without moving. In most cases, these clients have been women and have had a higher body fat percentage at or around their hips. The extra fat decreases the sp gr in the legs which helps keep them level on the surface.
Understand that your center of gravity shifts is the key to your sinking leg problem.
By changing your body position you can keep the center of gravity close to the center of buoyancy. The closer you keep these two points, the better you will balance.
There are a few ways we can do this:
{1} Increase the amount of fat on your hips and thighs.
Fat floats. If you have more fat around the most dense part of your body, you shift the center of gravity forward.
If you carry a higher percentage of fat on your hips and thighs, you will balance better. While this is a potential solution, it isn’t practical for your triathlon performance. It’s likely to negatively impact your bike and run times and effort.
{2} Kick more and kick harder.
Every time one of your legs kick down there is an equal and opposite reaction pushing up. The upward push lifts your legs in line with your hips and head keeping your body balanced.
If you have a good kick, you can keep your body balanced by increasing your kick tempo and the force of your kick.
This is a highly effective solution. And it’s something you will want to learn and practice. But you have to manage how you kick. Too much kick will use a lot of energy that could be better spent elsewhere on race day. You need to use your legs in your freestyle, but you need to strike a balance.
{3} Manipulate and control your body positions
By changing your body position you can keep the center of gravity close to the center of buoyancy. The closer you keep these two points, the better you will balance.
By making subtle adjustments to your body position you can change how well you balance. So fixing your sinking leg issue comes down to technique and how well you can find good body position.
This is why I began this chapter by saying:
“Your body composition is not a limiter on your ability to swim fast.
Your technique or positioning does.”
If you get into the wrong positions you will sink. Using the wrong technique, you increase the distance between your center of gravity and center of buoyancy. As that distance increases, your legs sink deeper.
When you find the right technique, you will float. You will stop praying for a wetsuit legal swim. You’ll finally be able to throw away your damn buoyancy shorts. You will finally find efficiency and speed in the water.
When you find the right technique, you will float and finally find efficiency and speed in the water.
The rest of this guide is dedicated to explaining changes you can make to positively affect how well you float.
I’ve identified and explained the 15 most common technique mistakes I see triathletes make and give you the exact steps to fix each one. Let’s get into it!
- *https://www.amazon.com/Applied-Biomechanics-Connections-John-McLester/dp/0495105864/ref=sr_1_1?s=books&ie=UTF8&qid=1526981953&sr=1-1&keywords=9780495105862 Page 235
- * The density and temperature of the water you are swimming in plays a small role.
The sp gr of salt water is 1.025 (up from 1.00 in freshwater). Because salt water is more dense than freshwater, you will float higher in the ocean than you do in the pool.
Fixing Your Sinking Leg Problems
Ok, you get it. You CAN stop your legs from sinking. We just need to understand what the root cause of your issue is, and then work to solve it. Let’s get into the details.
Root Cause No 1:
Holding Your Head Too High
Imagine your body as a seesaw or teeter-totter. One end of the line runs through the crown of your head, then down your spine and finally out between your legs. If you lift your head up, that end of the see-saw rises and the other end (your legs) drop.
You can feel this see-saw effect right now with a little experiment. Lay down on your belly with your forehead resting on the floor. Keep your hands at your side. Now lift your forehead up off the floor and feel how your hips push down into the floor.

If you hold your head too high, your hips and legs will sink.
――――――――――
Why It Happens

As a human, the responsibility for your survival lies with the prim
itive part of your brain *1.
The operation of this part of your brain is mostly out of your conscious control. Years of living as a land creature has ingrained an operating system that views the water as a threat. Holding your face underwater is simply not normal!
When you lower your face and ears into the water, your primitive brain recognizes a threat. So it sends out signals to le
t you know that you can’t breathe in water! “Dude, this is not a place you can live! You should 100% get out of here!”
Keeping your face submerged is NOT natural! The natural response is to lift your head up out of the water!
If you were to relax your head and neck into the water you would be going against your natural survival instinct.
This is the most common reason new swimmers hold their head too high. The higher you hold your head, the easier it is to quieten the very nervous, primitive brain. To the primitive, survival brain, the closer you are to the surface of the water, the closer you are to safety.
- http://www.mindspring.com/~divegeek/primitive.htm
――――――――――
How To Fix It

Relax your head, neck and shoulders!
To do that you’ll have to rewire your primitive thoughts. This rewiring comes through building a better association & relationship with the water. Learning that the water can be a safe place. This is a process and for some people it takes a fair amount of time.
To start building a better association with the water, I recommend you play in it. Play games with your children or your friends. Go to the water park, play around in the splash pool; have some fun. As you enjoy your time in the water your fear response will begin to subside. You will find it easier to relax your head and neck into the right position.
Breathing bobs will also help to ease your fear and get you more relaxed and comfortable. As you do the bobs, be very intentional about quickly inhaling and then slowly exhaling. Control the flow of your breath as much as you can. Really focus on the quick air in and long air out. When you are intentional about your breath it tells your primitive brain it can relax. “Dude, you’re going to be ok.”
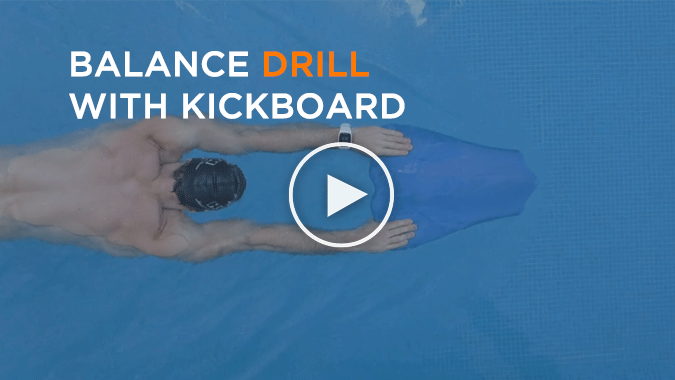
Finally, doing the Balance drill with a kick board will help you to relax your head into a good position. Doing the balance drill with a kickboard is a great introduction to holding your head in a great position. It makes holding your line and relaxing your head much easier with the support of the kick board.
Root Cause 2:
Looking too far forward
Looking forward is a very easy mistake to make. It is one I personally struggle with. It is common in both beginners and competent, experienced swimmers.
You might have your head at the right level in the water, so you’re not holding it too high. But if you’re straining your eyes too far forward it can cause your hips to drop.
What’s interesting about this root cause is; your hips may not drop while your face is in the water. Depending on your flexibility you could actually look fairly far forward and still keep your hips up.
Depending on your flexibility you could actually look fairly far forward and still keep your hips up.
But when you look too far forward the hip drop happens when you turn for the breath.
Here’s why; as your eyes creep forward your chin moves away from your collarbones and chest. As a result your mouth ends up being deeper in the water than your forehead. So, when you turn to breathe you’ll have to lift your head higher to make sure your mouth clears the water. It’s this head lift that causes the hips to drop.

When your eyes look downwards your mouth sits at the same level as your forehead. So to get your breath your head doesn’t need to lift for your mouth to clear the water. And as a result your hips stay in alignment.

――――――――――
Common Causes
This mistake is usually caused by wanting to see where you are going.
I personally struggle with looking too far forward. I spent years sharing lanes in 25m pools with 6 to 8 other 6ft+ tall swimmers. This setup makes for a great team environment (and a lot of drafting). But in crowded lanes you’re constantly trying to make sure you’re not going to swim into people. So you look forward. With enough repetition, it became a bad habit that stuck
You may have a similar problem if you swim in a new pool that you aren’t familiar with. Or if you swim in a pool without lane markings on the bottom or flags at each end.
In open water a more common cause is being lazy when finishing the sighting movement. After the sighting stroke you need to get your head back down into a neutral position. If you drop your head down but keep looking forward your mouth will be in a bad position for the next breath.
――――――――――
How To Fix It
Depending on your flexibility you can get away with looking forward to a limited degree. Eyes directly down is ideal, but there aren’t a lot of swimmers that actually hold this position. Provided your hips stay on the surface you can look forward.
You will have to experiment (or get a video analysis done) to find what’s right for you.
{1} Work The Balance Drill
The Balance drills will help you find a good neutral head position. You can experiment with how far forward you look while keeping your hips on the surface.

{2} Adjusting For the Breath:
If you do look forward, you will need to bring your chin closer to your collarbone as you initiate the breath. This can be hard to control as a beginner without affecting some other part of your stroke. In general you want to limit your head movement as much as possible. The more you move your head, the greater the probability of downstream problems.
{3} Practice The Superman Drill
The superman drill will let you play with the degree to which you can look forward when you breathe.

{4} Finish Your Sighting Stroke Correctly:
Don’t save your sighting practice for the open water. Practice your sighting regularly in the pool. Work on it regularly during workouts. Learn to return your head to a neutral position after the sighting lift. The more you practice lowering your head to the right place the better.

Root Cause 3:
Lifting Your Head to Breathe
You have the best chance of keeping your hips and legs up on the surface when your head is down in the water. The moment you introduce the breath, the chance of your hips dropping increases.
You can have the perfect head position through your stroke cycle. But if you lift or over rotate your head when you turn for your breath, your legs will drop.

The lifting of your head to breathe is a chicken and egg situation. Dropped hips will cause you to lift your head and lifting your head will cause your hips to drop.
The lifting of your head to breathe is a chicken and egg situation. Dropped hips will cause you to lift your head and lifting your head will cause your hips to drop.
As we talked about in the previous section, when your eyes look downwards your mouth sits at the same level as your forehead. So to get your breath your head doesn’t need to lift for your mouth to clear the water. And as a result your hips stay in alignment.
But, your sunken hips will pull your mouth deeper in the water. + of your head causes your hips to drop further which will cause you to lift your head even higher. It can become a vicious cycle!
Here’s a video I did with Dave Erickson from Endurance Hour a few years ago that explains it. Try to not to laugh while I almost drown 🙂
――――――――――
Why It Happens
There are two common reasons why you’re lifting your head for the breath.
{1} Your Hips & Feet are Too Low
- It’s caused by your dropped hips and legs. They’re pulling your mouth down deeper than your forehead so to take in a good breath you have to lift your head.
{2} You’re Still Lifting Your Head
- If your hips are in a good position and you’re still lifting your head, your primitive brain is to blame. You lift your head because you lack the confidence to keep your mouth close to the surface of the water. Your primitive brain and it’s survival instinct says;
“Dude, you’ll breathe in water if you’re this close, we need to get way away from here to get in a good breath”
If you don’t feel like you can get a good enough breath in without choking, you will lift your head high. High enough to a point where your primitive brain is comfortable no water will go in along with the air. The higher you lift, the bigger the hip drop effect will be.
――――――――――
How to Fix it:
First determine which is the likely cause for lifting your head. A video analysis will help you work out if the root cause is because your hips are low due to one of the 15 root causes.
If it’s a confidence problem with keeping your mouth close to the water here’s what you can do.
{1} Practice Crocodile Breathing
Getting water in your mouth is an unavoidable fact of swimming. You’re surrounded by the stuff. It’s pretty much impossible not to take in some water at some point. Crocodile breathing helps you to combat your fear reflex. It will help get you comfortable breathing when you have water in your mouth.

{1} Find a spot in the pool that you can stand comfortably.
{2} Slowly lower your head into the water so half of your mouth is below the surface of the water and half of it is above the surface
{3} Practice breathing “over the top of the water” in your mouth. Slowly get comfortable breathing when you have water in your mouth.
{2} Progress To Side Crocodile Breaths

{1} Find a spot in the pool that you can stand comfortably.
{2} Rotate your head as if you were getting into the side breath position you would liket to hit when you swim freestyle.
{3} Slowly lower your head into the water so one eye, one ear and half of your mouth is below the surface of the water and half of your face is above the surface.
{3} Practice breathing “over the top of the water” in your mouth. Slowly get comfortable breathing when you have water in your mouth.
{3} Move To The Side Kick Drill

Each of these drills will help you get confident keeping your mouth close to the surface when you take a breath.
Growing this confidence usually takes time. Your primitive brain is taking care of your survival by making sure you don’t breathe in water. So fixing it is often not as simple as flipping a switch or doing these drills once. You’ll literally need to rewire your brain to be ok with the risky breath position.

Children pick it up faster because their primitive brain hasn’t been active for as long as yours. At the end of the day, the more you repeat it the more comfortable you will become.
Root Cause 4:
Over Rotating
Over rotating is one of the most common mistakes I see Age Group Triathletes make. You need effective rotation in your stroke, it helps maximize propulsion. But the appropriate degrees of rotation is often misunderstood. Rotating too much will cause your hips to drop!
When you over rotate a couple things happen. I’m going to break these down into subsections and explain each of them. We can link why each of the errors are causing your hips to drop back to your over rotation issue.
――――――――――
Why It Happens
There are generally two reasons why new swimmers tend to over rotate.
{1} Thinking More is Better.
One of the first things you’ll get taught when you learn to swim is the importance of rotation. Most YouTube videos and online guides will emphasize the need to avoid “swimming flat” and to reach and rotate. Without any guidance on how much or how to effectively rotate new swimmers will go from too little to too much rotation very quickly – more is not necessarily better!
{2} Not Enough Core Strength to Control the Rotation
If you aren’t able to stop the momentum that comes with your rotation from side to side, it is very easy to rotate past the point of utility and move into over rotation. To stay in the right rotation range we need a strong core to stop and then reverse the rotation once we have hit the optimal point.
Let’s take a look at the stroke faults associated with over rotation and how to fix them:
Over Rotation Problem 1:
The Scissor Kick
If you rotate past a point that you are able to control it, you run the risk of rolling over on to your back.
When you rotate, you create momentum. As one shoulder comes out the water the other rolls down beneath the surface. You need to be in control of this momentum. If you aren’t it will continuing through 180* and you’ll end up on your back!
Your brain knows you aren’t supposed to roll onto your back. So if you don’t have the core strength to control the momentum, your brain takes over and finds a way to stop the roll!
To prevent a 180° roll your brain forces one of your legs out wide to stabilize your body. This stops the roll, but it also drops your hips.
To prevent a 180° roll your brain forces one of your legs out wide to stabilize your body. This stops the roll, but it also drops your hips.

The wide kick is commonly referred to as a scissor kick. Instead of narrowly kicking up and down your legs scissor wide apart and then back together.
The problem with the scissor kick is that it’s stopping you rolling by kicking sideways. While you’re kicking sideways, you’re unable to kick down. With no downward kick there’s no upward force to keep your hips and legs up on the surface.
――――――――――
How To Fix It
{1} Limit Your Rotation
The scissor kick is a downstream problem caused by how much you are rotating. If you limit your rotation you will go a long way to solving the problem.
{2} Brush your big toes together
You want your kick to stay small and tight. Kicking up and down, not side to side. Get your big toes to brush up and down against each other with every kick. You’ll know the movement is staying small enough and it’s up and down, not side to side.
{3} Increase your Stroke Rate
Over rotation and the scissor kick often happen when you glide too long out in front of your stroke. A long stroke can be more efficient than a short stroke, but not if it’s killing your forward momentum.
If you’re too focused on extending out in front, your bottom shoulder may be dropping too deep into the water. As the bottom shoulder drops your legs split to stop the roll.
Decrease the length of your glide and increase your stroke rate. This will limit your rotation and cut the scissor kick.
Over Rotation Problem 2:
Pushing Downwards not Backwards
If your shoulder drops too low into the water once you have entered and begin to extend, the rest of your arm is almost certainly dropping too low too.
You know you are pushing down when there is a big gap between your ear and your bicep and shoulder .

Every action has an equal and opposite reaction. So the push down on the water helps lift your head up. When your head lifts, your hips sink so pushing downwards has a direct effect on your hip and leg position.
The push down on the water helps lift your head up. Like a seesaw, whe your head lifts, your hips sink.
Most good swimmers have a small amount of downward force on the water at the start of their pull. But the earlier in the movement you begin to push water backwards the more effective you pull will be. And less of an effect there will be on your hips and legs.
――――――――――
Why It Happens
Pushing downwards early in your pull usually happens for one of two reasons.
{1} Lack of confidence in your breath
You’re pushing down to lift your head up higher for the breath. You lift your head because you lack the confidence to keep your mouth close to the surface of the water. The higher you feel you need to lift your head, the deeper you push down.
{2} Poor Flexibility Through Your Chest, Shoulders and Lats
Your upper body flexibility affects how quickly you can start pushing water backwards. The less flexible you are, the longer you’ll apply downward pressure on the water. The more water you push down, the higher your upper body lifts and the deeper your legs will sink.
――――――――――
How to Fix It
You want to be using your arms to drive water backwards and propel you forward, not to lift you up.
If you’re pushing down because of reason 1, go re-read the breathing section. Work on getting comfortable breathing low to the water with Crocodile breathing. Then learn to stabilize through the breath using your core. Do this by practicing the Balance and the Side Kick Drills.
If you’re lacking flexibility through your lats, it’s time to start mobilizing.
{1} Hang from a bar.

One of the simplest ways to improve your flexibility to help your pull is simply to hang from a pull up bar. Hold the bar with your hands shoulder w
idth apart, try to keep your head in a neutral position and just hang. The goal is to get your body to hang in a straight line.
Suck your belly button into your spine and squeeze your butt cheeks together to tighten up your core. Don’t cheat by arching your body to help make it easier. You’ll place extra strain on your back and won’t actually be stretching correctly.

{2} Do Yoga
I’ve found yoga to work a lot better for me than any stretching routine. Yoga hasn’t just helped increase my flexibility. It’s also taught me how to breathe and helped strengthen my core.
Over Rotation Problem 3:
Breathing Too Late
The timing of your breath might be to blame for your over rotation, scissor kick and early push down.
The timing of your head turn is critically important to maintaining your balance. If you turn or return too late you will over rotate, your legs will flay and your hips will drop.
{1} Timing the Turn
You want the head to start turning to the side right was your opposite fingertips enter the water.
{2} Timing the Return
You want your head to start turning back into the neutral position right before you get into the catch. What I mean by that is as you begin to push water backwards with the bottom arm, your head should be starting to come back.
If you wait until that arm has entered and extended before you turn your head you’re not going to get a good breathe in.
When you turn your head late but return it at the right time you’re not going to have enough of a window to get in a good breath. Your inhale will feel short and rushed. You’ll quickly begin to feel the oxygen debt build as you work through the lengths.
If you start to return your head downwards too late you’ll throw off your body’s balance. This is when you over rotate, scissor kick and feel your hips and legs drop. You will also lose out on a big proportion of your propulsion.

――――――――――
Why it Happens
The late breath usually occurs because you feel you need more time to inhale. Either because you’re short of air or because you want to get your mouth well clear of the water. So you hold your head out the water a little too long in the hope of getting a little more air into your body.
Sometimes breathing late is simply a timing issue. You’re just not nailing the exact moment your head needs to start turning and returning. If you don’t have the right rhythm your timing will be off.
――――――――――
How To Fix It
There are three points to focus on to get your breath timing right.
{1} Starting the breath at the right time
{2} Making the inhale quick
{3} Returning your head at the right time
Let’s work through each of them to make sure you get the breath cycle right.
{1} Starting the breath at the right time
When you think about the exact moment to turn your head, it’s easiest to relate it to what one of your arms is doing at the moment your head should start to move. You have two choices here;
{a} You can either work on turning your head as the fingertips on your recovering hand enter out in front of your head.
{b} You can work on turning your head as your pulling hand passes your shoulder on it’s way to finishing the stroke at your hip.
Both of these two happen at the same time (in a balanced stroke). Some swimmers I’ve worked with find it easier to focus on when the hand enters. While others find focusing on the back end simpler.
Here’s how you can work on that timing:
{a} Balance +1 Drill

The Balance +1 Drill will help teach you to hold your body position through the breath, but we can use it to learn the correct breath timing too. When doing the Balance + 1 Drill you will want to focus on turning your head to breathe before the elbow and hand of your pulling arm has passed your shoulder. The goal is to get the head to turn early, to feel like you are “pulling” yourself to the breath.
{b} Breathe Like A Champ Drill
The Breathe Like A Champ Drill is a good test of whether or not you have the timing of the breath right. As you did in the Balance +1 Drill, you will want to focus on turning your head to breathe before the elbow and hand of your pulling arm has passed your shoulder. The difference with this drill is you don’t have the extended arm out in front of you to stabilize your body, making it a lot more difficult to keep yourself aligned through the breath.

{2} Returning Your Head at the Right Time
We can use the same drills to help you get your head back down early. Typically, the earlier you start the breath, the quicker your head will come back to the neutral position. You’re goal is to start bringing your head back down right as your pulling hand passes underneath your shoulder.
The Breathe Like A Champ Drill will help you use the return of your head to power up the propulsion of the catch and pull. If you turn your head too late you will need to rely heavily on your kick to move you forward. If you get the timing right, you’ll feel yourself shoot forward with every pull.
You can also use a One Arm Freestyle stroke to help you with the return timing. Swimming with one arm (and breathing to the same side) will tell you if you are leaving your head out of the water too long. You should not be able to see your hand recovering back over while your face is to the side. By the time your elbow passes your ear your head should be well on it’s way back into the neutral position.
{3} Making the Inhale Quick
Between the turn and return is how long it actually takes you to inhale.
You only need to turn your head enough to get your mouth out the water, grab the breath and then turn your head back down. There isn’t a big window of time to get this breath in, you have to be quick and confident to get it right.
To build confidence in a quick breath, go back to the breathing drills. Work on the breathing bobs and crocodile breathing drills. Work on making the inhale short and sharp while doing the bobs. Get comfortable having water in and around your mouth. While still getting in enough air.
When you’re comfortable with those move onto the superman and side kick drills. Work on keeping your head low (lifting up will cause your hips to drop) and making the breath fast.
{a} Superman Drill
{b} Side Kick Drill
Over Rotation Problem 4:
Pulling Through Too Early
We know that your center of gravity shifts up and down depending on what position your body is in. The further up your body the center of gravity moves, the better you will be able to stop your legs from sinking.
One way we can shift your center of gravity forward is by adjusting when you catch and pull through. The thinking goes something like this:
Your lungs are the center of buoyancy and the pivot point of your balance. By shifting more of your body weight forward in front of your lungs you can balance out your body and keep your hips up.
I’m 187cm (6ft2) tall.

But if I raise my hands up above my head I add an extra 70cm+ to my total height and have a lot more weight distributed forward ahead of my lungs.

If you pull through too early you spend a lot of time with very little weight distributed ahead of your lungs. With less weight shifted forward your center of gravity moves down towards your hips. And as a result your legs sink.
――――――――――
Why it Happens
There are two primary reasons I see swimmers pulling through too early.
{1} The need to push down to support your body
If you feel out of balance or like your sinking the temptation will be to go to your arms for support. When you begin to push down with your arms you get the lift up which helps you feel like you’re no longer sinking. But that push down also starts the pull through very early in relation to the recovering arm. Your pulling arm drops deep into the water. Disappears past your shoulder before the recovering hand enters.

{2} You Lack Confidence in Your Breath
You’re pushing down to lift your head up higher for the breath. You lift your head because you lack the confidence to keep your mouth close to the surface of the water. The higher you feel you need to lift your head, the deeper you push down.
――――――――――
How To Fix It
{1} Catch Up Drill
A lot of coaches rely on the Catch Up Drill to help teach you how to keep your weight distributed forward for longer.
If you are not familiar with Catch Up, here’s how you do it:

It is regular freestyle, with a pause out in front. You must wait for the recovering hand to touch the extended hand before it can pull through. Only once your hands touch can you pull through for your next stroke.
Waiting for your hands to touch keeps more body weight shifted forward ahead of your lungs. The touch gives you a physical cue to keep exchanging one arm for the other out in front of your head.
The catch up drill can teach you a great lesson in staying extended and not pulling through too early. But it’s not a great way to swim freestyle.
Waiting for your hands to touch out in front disrupts the continuity of your stroke. It halts forward momentum. While your lead arm waits for the recovering arm to enter and touch you STOP moving forward. This means you have to re-generate your speed from scratch with every pull.
When you swim Catch up freestyle you stop/start/stop/start which isn’t economical. And every time you stop, you’ll feel your hips sink.
{1} Front Quadrant Freestyle
Front Quadrant Freestyle takes the benefits of the Catch Up Drill without killing your momentum.
Most distance swimmers use a Front Quadrant stroke as it is very efficient. Swimmers like San Yang, Ian Thorpe and Grant Hackett are the poster child for this stroke.
But. There is a but… Front quadrant swimming doesn’t work for everyone. And isn’t always right for open water. I’ll talk about that more in a second.
No matter how you swim, you need to keep the concepts of front quadrant swimming in mind. This is what keeps your weight distributed forward ahead of your lungs, helping keep your hips up.
To swim Front Quadrant Freestyle; wait until the recovering arm has passed the line of your head before you start your pull.
You could say that Front Quadrant Freestyle is 3/4 Catch Up Stroke. You start to pull through when the recovering elbow is inline with your ear. Instead of waiting for your hands to touch before you pull back.
If filmed from above we want to see some part of you hand extended out in front of your head at any time in the stroke cycle. You must make sure the lead hand stays extended out front during the recovery of the other arm.


If the lead arm disappears past the head before the recovering arm enters the water, you have a problem. Your shoulder will be dropping too low. You’ll be pushing down too much. Your hips will sink and it will slow you down.
3/4 Is A Rough Guide
You can adjust the length of time you keep the lead arm extended based on:
- Your body type
- The distance you’re swimming
- Your speed
- The water/weather conditions.
- Long distance / Slow speed / Flat calm water = More Extension
- Short distance / High Speed / Rough Water = Less Extension
In the pool, you have the opportunity to be more patient with that lead arm. You can keep it extended and ride your line as long as it doesn’t kill your momentum.
Root Cause 8:
Poor Posture And / Or a Weak Core
Your belly (abs), mid and lower back make up the muscles in your “core”.
Your core is the link or bridge between your floaty lungs and sinking legs. It’s what holds the line of your body together. You need your core engaged to take advantage of the buoyancy from your lungs. You can only leverage how much your lungs float if there are no breaks in the connection to your legs.
When you have a solid connection through your core you shift your center of gravity forwards. This will bring your hips up to the surface.
Try this; push down slightly with your collarbones and lean forward over you lungs. As you do the connectivity of your core will bring your legs up to the surface. If your core is weak however, your legs won’t float up.

The role of the core in your stroke goes beyond keeping your legs up. When you connect your arms and legs using your core your body will be in good swimming posture.
Coach Gerry Rodrigues from Tower26 calls this connection through your body tautness. He has a great way of explaining the idea. He says you want to be more like a straight uncooked spaghetti stick than a noodly cooked piece. Your core is what helps maintain that straightness and posture.

――――――――――
Why It Happens
The western lifestyle is probably the biggest culprit.
Most of us have poor posture and weak or disconnected cores. We sit too much and we spend too much time hunched over the screens of our phones. We spend most of our days with our cores relaxed and turned off. It’s become our normal and it translates to poor swimming.
――――――――――
How to Fix it
{1} The Temporary Fix: Buoyancy Shorts
The best temporary fix is a pair of core or buoyancy shorts. This is the one most Triathletes will go to first. They compensate for your disengaged core, bringing the hips and legs up onto the surface. Some of my athletes use these shorts from time to time, but they can create a problem when you become dependent on them.
The problem is, wearing the floaty pants too often will give you an inflated sense of your swim fitness. This seldom transfers to good speed on race day. You look fast on Strava during training, but when it actually matters, you won’t have the core strength to perform.
{1} The Solid Solution: Strengthen Your Core
The permanent fix is to work on your core strength. Fixing your posture and strengthening your core is worth investing your time into. Both in and out of the water.
{a} Improve Your Core Strength On Land
Incorporating a core strength routine into your training is a great place to start. Doing yoga will also help improve the strength of your core.
Fares from MySwimPro has a great video that breaks down the 10 Best Core Dryland Exercises for Swimmers.

{b} Improve Your Core Strength In The Water:
● Use A Snorkel
I like to have my swimmers use a snorkel when working on their posture. The snorkel helps teach you how to keep your head still and maintain a good line down your spine. This will go a long way towards helping you master your balance and alignment. It also removes the need to breathe. So you can concentrate exclusively on your body position.

● Strap on The Ankle Locks
When I was a swimmer, ankle locks were my worst nightmare. I hated using them! But I recognized how valuable they are to alignment and core stability. They teach good posture and will help you learn how to stop snaking through the water.
● Fundamental Drills
In the water, the Balance drills and Side Kick Drills need to be your focus. Each of these drills has been mentioned previously, and each will work on isolating your core and legs. Removing your arms from the equation will force your core to activate.
Root Cause 9:
Not Kicking
Your kick does a lot more for your body position than it does for propulsion. It is one of the primary ways to help keep your hips and legs from sinking.
The downward part of your kick actually provides lift that helps bring your heavy legs up to the surface. In the same way that pushing down on the water with your extended arm lifts your body up.
This is a simple physics principle. Every action has an equal and opposite reaction.
Every time one of your legs kick down there is an equal and opposite reaction pushing up. The upward push lifts your legs in line with your hips and head keeping your body balanced. When you stop kicking there is no upward force strong enough to overcome the pull of gravity so your legs sink.
――――――――――
Why It Happens
In general, triathletes hold a pretty strong misconception about kicking.
The idea that you need to save your legs for the bike and run is a common mistake. The thought process isn’t necessarily wrong per se….
You absolutely want your legs feeling good for the bike and run. But by not kicking at all you’ll burn through more energy than if you kick just enough to drive an efficient stroke.
A light kick will raise your hips and legs and give you the stability you need to maintain your balance.
Not kicking at all will result in
- sinking legs
- dropped hips
- increased resistance
- higher energy expenditure.
――――――――――
How To Fix It
There is no quick way to learn to kick efficiently, especially if you learned to swim as an adult. However, there are a couple of drills and tools you can use to help speed up the process.
{2} Vertical Kick

Vertical kicking is the best drill you can do to improve your kick. It forces you to keep your kick narrow and fast (otherwise you sink). It gives you instant feedback on where your kick is going wrong. And how powerful your kick is in one direction relative to another direction.
{2} Kick With Fins
Get a pair of fins and use them in during your warm up and cool downs as well on selected drills.
You’ll want a pair of short blade fins as opposed to the long divers fins. The short blade fins allow you to replicate the kicking motion more accurately.

Swimming with fins on will force your ankles into a flexed position (which helps improve ankle mobility) and will also give you a good feel for pushing back and down on the water.
Root Cause 10:
Kicking Too Big or Too Deep
We’ve just talked about how the downward kick helps lift the legs up. But if you drive your legs down too deep, you will pull your hips down deep with them.

You want your hips to remain at the surface at all times. The deeper your kick goes, the harder it will be to keep the hips on the surface. After you kick deep you have to recover the heels a long way back to the surface.
Keep your kick small and consistent. A good rule of thumb is to keep the depth of your kick to the same size as your hips. Measure your hips and then drop that width down into the water. You want to keep your feet within this box. Driving the legs down deeper than that will cause your legs to drop.
――――――――――
Why It Happens
This issue takes root when a swimmer is first learning to kick.
The first time you try the kicking movement, chances are the natural instinct will be to kick to be to kick very big. Often it will replicate the size of your stride when you walk or run, which is much bigger than we want to see in the water. If you are learning on your own and have no one to provide you with feedback you end up building a habit of kicking deep.
It’s likely not until you see your kick on video or have a coach point it out that you will notice just how big your kick is.
――――――――――
How To Fix It
{1} Vertical Kick
Vertical kicking is the best drill you can do to improve your kick. It forces you to keep your kick narrow and fast (otherwise you sink). It gives you instant feedback on where your kick is going wrong. And how powerful your kick is in one direction relative to another direction.
{2} Kick With a Pull Buoy In
You can use your pull buoy to help teach you how to keep your kick narrow.
Swim regular freestyle or do the Balance drill with the pull buoy between your legs.
Work on increasing the propulsion coming from the flick of your ankles. At the same time, make sure you keep the pull buoy between your thighs being careful not to let it pop out.
{2} Kick With a Band
If you’re really struggling with kicking too deep or too big, take a pair of pulling bands and loop them together. Slide the bands around your ankles and swim freestyle.
At first you may want to try wearing a snorkel so you can get the kick right without having to focus on your breathing.
The bands should stop your kick from getting too big. You’ll feel the resistance increase as your kick size increases.
Root Cause 11:
Incorrect Kick Timing
Doc Counsilman is known as one of the greatest swimming coaches of all time. In the 1980’s he conducted studies on the freestyle kick and his findings were very interesting.
One of Coach Councilman’s observations centered on the timing of the kick. His study suggested that if your kick is not timed correctly you will actually swim slower. Even if you kick harder. A kick that isn’t timed right can slow you down as much as 6%, despite the energy spent on the movement.
The timing of your kick must coordinate with the cycle of your ams to give you balance and propulsion. When you time the kick correctly you counterbalance your stroke. This means your body stays in better alignment and your hips sit higher in the water.
What’s The Right Kick Timing?
To get the timing of your kick right, the kick down of each leg must coincide with the entry of the opposite arm. So as you right arm enters, your left leg must kick down and vice versa.

――――――――――
Why It Happens
If your right leg kicks down at the same time as your right hand enters you lose stability. Both the right leg and right shoulder will drop at the same time. Resulting in that side of your body dropping deep into the water.
This becomes a particularly big problem if you swim with a 2 Beat kick. With a 2 beat kick you only kick down one time per hand entry. This single kick tends to be stronger and more powerful (because there is only one). If you are powerfully kicking down with one kick on the same side as you’re entering the arm, you amplify the hip drop.

Timing the kick down of your right leg with the entry of your right arm counterbalances your body. Neither side drops deep so your body floats up higher on the surface.
――――――――――
How To Fix It
{1} Easy 6 Beat Kick
A light 6 beat kick will help maintain your stability most effectively. By keeping your kick small, quick and constant you won’t be over emphasizing either leg. So you run less of a risk of getting the timing wrong.
The goal is not to overkick or drive from the legs. Rather you’re looking to keep the kick small and light.
Taren from Triathlon Taren does a really nice job of explaining the danger of the 2 beat kick here:

{2} Timing Kick Drill

If you are going to stick with a 2 or 4 beat kick, the kick timing drill will help you find the right timing.
By putting only one fin on you will be far more aware of when you are kicking down with that leg. This gives improves the feedback to the brain reinforcing when you have the timing right.
{b} Breathe Like A Champ Drill
Removing the stability of one arm will amplify the effect of the hip drip if you have the timing wrong. When you get it right, you will immediately know you’re in better balance.

Root Cause 12:
Bicycle Kick
To kick effectively your knees must bend. But, we’re not riding a bicycle, or even kicking a football. That would be too much knee bend. Bending that much would move your legs outside the profile of your upper body.

You want your legs to stay hidden behind the profile of your upper body. When you bicycle kick, each time your knee comes forward it will drop outside that profile. This drop increases you frontal resistance and can drop your hips down.
So to get it right, how much knee bend are we looking for?
Well it’s kind of like Goldilocks search for the perfect porridge in the home of the Three Bears.
Too much knee bend is going to create extra resistance.

Too little knee bend doesn’t create enough force to provide stability or move you forward.

Somewhere in the middle is just right! You’re aiming for more straight than bent. So if you struggle with this, rather over correct with no knee bend.

――――――――――
Common Cause:
The freestyle kick is a unique movement. There are practically no other ways in which we would replicate this movement in your daily life.
In contrast, think about the way you walk or run. That movement pattern has been deeply ingrained into your legs and brain. It’s a deep habit.
Walking, running or riding a bicycle has created a habit that causes you to bend your knee more than you should. You have to learn a different movement pattern to kick correctly. You can’t borrow the walk/run/ride pattern.
――――――――――
How To Fix It
There two points to think about when it comes to the knee bending:
{1} The knee bend should lift your heel up towards the surface of the water. It should NOT pull your thigh in towards your stomach.
{2} Your thighs should always remain hidden in the profile of your torso and upper body.
Drills:
{1} Vertical Kick
Vertical kicking is the best drill you can do to improve your kick. It forces you to keep your kick narrow and fast (otherwise you sink). It gives you instant feedback on where your kick is going wrong. And how powerful your kick is in one direction relative to another direction.
{2} Kicking On Your Back

Flip yourself over and kick on your back with your hands by your side. Make sure you that your toes stay up at the surface of the water. The toes on both feet should be breaking the surface with every up kick.
Be sure you keep your knees under the water as you do this drill. You don’t want your knees to be breaking the surface. If the do, you will be working against a lot more resistance when you flip back over onto your front.
{2} Balance Drill

The balance drill is essentially a kicking drill in disguise. To get the balance drill right, you have to kick correctly. Bending your knees will throw off your balance and break your alignment.
Root Cause 13:
Poor Ankle Flexibility
If you can’t extend your ankles so the top of your foot is an extension of your shin, your feet are acting like anchors behind you, pulling your legs down.
In a perfect world, your ankle should open up more than 90°.

Bad Ankles – acting like anchors and stopping you moving forward!

Ok Ankles – not acting like anchors but not helping your move forward

Great Ankles – helping you reduce drag and move forward!
If you can’t get to 90°, moving your legs is actually going to slow you down! You can put all the energy and effort into kicking more. Kicking harder. Kicking faster. It won’t do you any good. In fact it will make you slower!
――――――――――
Common Causes
Ankle flexibility is one of the biggest reasons the kick is such a major issue for triathletes. Especially for runners and cyclists transition into swimming and triathlon.
Running and cycling promotes stiff, strong and supportive ankles. But in the water we want supple flexible ankles.
As a triathlete you will need to find a balance between suppleness and support. Suppleness for the water and support for the road.
I wouldn’t wish floppy ankles like mine on anyone. They cause a lot of issues when I run. But to kick well you need enough range of motion in your ankles to kick water downwards. The downward whip kick is what lifts your legs up, balancing out your lower body.
――――――――――
How To Fix It
You can take an active and or passive approach to your ankle flexibility. You’ll see faster changes with the active approach. But if you are time crunched the passive approach will work as long as you are consistent and patient.
{1} Stretch & Mobilize
Add in a focus on your ankles and shins to your stretching routine. There are two stretches and some soft tissue work you can do to help.
{a} Adjusted Warrior Pose

This is a variation on the Warrior Pose you might see in a yoga class. In the Warrior Pose you lean backw
ards, planting your back heel into the floor behind you. To work your ankle flexibility, your going to plant the top of your back foot and push down while you lean forward.
The goal is to have the top of your foot form an extension of your shin bone. Stay in the position for 30 seconds. Release and swop your legs.
{b} Sit On Your Ankles
This is a more advanced and aggressive stretch. Please be careful when going through this progression.
- Sit down on the mat with your knees bent under your body and your toes pointed backwards behind you.
- Place a pillow under ankles at first. Don’t lower all your body weight onto your shins and ankles.
- As you get more comfortable with the stretch try to lift your knees off the ground. Use your hands to support you.
- Hold the position for 30 seconds. As you get more comfortable increase it slowly to a minute.
Stage 1: Ankles on a Pillow

Stage 2: Ankles Flate No Pillow

Stage 3: Ankles Up

{3} Roll Your Calves & Shins
- Grab your roller! Position the roller on the outside of your shin. We’re working on loosening up the tibialis anterior muscle (aka the soft outside part of your shin!)
- Rock your leg side to side on the roller. Start at the bottom near your foot and slowly move up towards your knee. It should take you 1-2 minutes to work your way up.
- Once you’ve done both legs, spend another 1-2 minute pointing your toes and then relaxing your foot. Again work the roller from the bottom of your shin up towards your knee. Stop and work any particularly tender spots.
{4} Kick with Fins
The passive approach to working on your ankle flexibility comes through wearing fins. The long blades on your fins force your ankles to flex and extend as you kick up and down.
Swim some of your warmups and cooldowns with fins on. Do some of your drills with fins. Practice vertical kicking with fins. As you do, your flexibility will improve over time.
*Notice I said some of your warm ups, drills, and cool downs. Don’t do everything with your fins. They’re a tool, not a crutch.
Root Cause 14:
Wearing Baggy Shorts
This is a mistake that new swimmers figure out pretty quickly. But it still gets made regularly. Why? Because… well, if you’ve never rocked out with your c*ck out, a speedo can feel a little intimidating.
The problem is baggy shorts act like parachutes. They collect extra water and add more weight to your hips and thigh. Your hips and thighs are already the most prone part of your body to sinking. So wearing the boardies multiplies the force of gravity on your legs. They pull you under and slow you down even more.

――――――――――
How To Fix It
You might not fancy a tight pair of speedos, that’s ok. But get yourself a pair of knee length jammers to swim in. You’ll notice the difference immediately.

Root Cause 15:
Being Too Tense
“The water is your friend…. you don’t have to fight with water, just share the same spirit as the water, and it will help you move.” Alexander Popov (Four-time individual Olympic gold medalist in Freestyle events. Regarded as one of the greatest sprint freestyle swimmers of all time.)
A tense muscle sinks faster than a relaxed muscle.
When you tense you restrict flow of oxygen through the muscle. The less oxygen we have running through a muscle the less float ability that muscle will have. This may be a minor factor but your rigidity does impact your floatability. A rigidly stiff muscle doesn’t move well. Their movement is mechanical which is not what you want to be in the water.
――――――――――
Common Causes
Being tense usually stems from a fear response. The fear is often accompanied by major or minor hyperventilation. When you take shallow breaths you reduce the air in your lungs. This reduces your buoyancy and increases that sinking feeling.

You want to relax. The goal is to hold enough tension to maintain a straight line, but no more. We want relaxed rigidity as Coach Kevin and Chris from the Tri Swim Coach call it.
The idea behind being relaxed is not to go limp.
You don’t want to get flabby and loose. Rather, you want to relax your shoulders, loosen up your ankles. You want to breathe at a rate that supports the intensity you are trying to swim at.
More than that, being relaxed means being in control of what your body is doing in the water. If the only thought that’s occupying your mind is how quickly you’re running out of air… Or you can only focus on getting to the end of the lane so you can grip onto the safety of the wall… you are not in control or relaxed!
Clear your mind. Focus on your breathing and make it flow.
――――――――――
How to Fix It
As adults (that are short on time) we tend to be very process oriented in our approach to swimming. In our effort to get better faster, we get mechanical.
We go on a quest to know exactly what to do and how to do it. We follow a set routine, go through the same motions and try to force ourselves to get out of our comfort zones. This approach might help you learn how to execute a skill. But it does very little to change the way your brain processes the threat of the water.
Our brains have evolved for an environment very different to the water. We have to change the way your brain processes the threat of being submerged.
Start by building a better association with the water. Play games with your children or your friends. Go to the water park, play around in the splash pool and have some fun. As you enjoy your time in the water your fear response will begin to subside. You’ll begin to see the water as a friend, not a threat.

Frequently Asked Questions on Body Composition
● I am 6ft5, could it be that my legs are too long and heavy?
The length of your legs will have an effect on how well you float, but is not an indicator of your swimming potential. The longer your legs, the further your center of gravity will move away from your center of buoyancy. But if you have long legs, you also likely have long arms. Using your arms to lengthen your body out ahead of your lungs will counterbalance your body. You can use the length of your arms to shift your center of gravity closer towards your center of buoyancy.
The best swimmers in the word tend to be taller and lankier individuals. If anything, long legs are an advantage in the water. Take a look at the average height of the medal winners from the 2016 Rio Olympics in each sport.

The male swimmers are taller than any of the other sports. The difference isn’t as big with the females, but they certainly aren’t the shortest.
If anything this study suggests that having long arms and legs is actually an advantage!
(https://coachsci.sdsu.edu/swim/biomechs/grimston.htm)
******************
● I’m at 10% body fat. Is it possible that I need to add more fat to float? My legs in particular sink like cinder blocks.
Fat will help you float, but it’s not going to solve your problem.
Matt Fitzgerald, author of “Racing Weight”, says that elite swimmers typically carry more fat than other endurance athletes. Elite male swimmers carry 10-12% body fat while elite females sit between 19-21% body fat, he says. By comparison, professional male triathletes carry 6-10%. While pro female triathletes sit between 12-16%. Fat floats, so the higher your body fat percentage, the better you would float.
But before you hit up Krispy Kreme. Rethink your strategy. Simply putting on fat is unlikely to help you swim significantly faster. Your total body fat percentage will play a small role in how well you float. But where that fat is distributed plays a bigger role.
Fat that’s distributed around your legs, below your center of gravity to help you float better. But if you carried more fat in your belly than you do in your legs, you’ll sink even faster. But then you have to look at the big picture. The downside of gaining weight to float will far outweigh you benefit. Especially when you get to your run on race day.
******************
● My bone density is unnaturally heavy. My legs just sink no matter what I do….
There are people that have higher bone density and may find it more difficult to float than others. But heavier bones does not mean you can’t balance and swim well. I personally sink like a rock.
You have to learn to adjust your body and manipulate the forces of buoyancy and gravity. If you have unnaturally heavy bones, you may not make an Olympic swim team. But you could still hold your own in a triathlon swim field! It just takes consistent time and consistent effort.
******************
● If I lay in the water and don’t move, my legs sink instantly and pull the rest of my body down. If I exhale, my whole body sinks to the bottom
Welcome to the club!
Buoyancy pushes up through the area of the lungs. Gravity pushes down through your hips and thighs. So your legs sinking is natural and makes complete sense.
Your lungs are big bags are air! They act as balloons that pull your upper body up towards the surface. Your hips and thighs on the other hand are packed with bones and dense muscles. These bones and muscles act as anchors, wanting to pull your lower body down towards the bottom.
If your lungs are partially filled with air they may not pull you all the way up to the surface. But the little air that is in them will stop your whole body from sinking to the bottom. If you exhale all of your air and empty your lungs, your whole body will go down.
To counteract this you will want to keep some air in your lungs at all times. Keeping the air in your lungs will help keep you bouyant.
******************
● I lack the natural ability to float and so I tire quickly…
No one floats naturally.
The human body isn’t designed to float horizontally. Learning to keep your legs up and float takes body control. You have to learn to manipulate the forces at play to get your head, hips and heels aligned.
When children learn to swim, floating is the first skill they learn. We start with the mushroom float. Then the Starfish Float and the Back Float before moving on to any actual swimming.
Children float better than adults. Their bone density is lighter. And their body composition tends to be better, but they still have to learn how to float. Once they learn it, they are able to hold on to it as their bodies grow and develop.
As an adult with heavier bones and more muscle, it is more challenging to learn the skills. But the water does support the human body very well, if you learn to manipulate the forces.
******************
● I’ve got very muscular quads and they just keep dragging me down.
The more muscular you are the more of a challenge floating horizontally will be. Carrying the dense muscles below your center of gravity will pull your legs under faster. But as I stated many times, this does not mean that you cannot learn to float.
Josh Schneider is a perfect example of this. Josh is 6ft4 and 220lbs. He played Football through high school and only really got into swimming in college. He’s a solid unit of muscle. Yet he swims the 100m Freestyle in 48.91 seconds. And represented the USA team at numerous meets around the world.
Another example is some of the Crossfit athletes I work with. One of my Crossfitters, Tanner weighs 200lbs and has a body fat percentage of 7-8%. While he’ll openly admit that the Balance Drill is not his favorite. But he has a CSS pace of 1.41/100m, very respectable for an adult learner that only swims twice a week.

This dude is jacked and still has a CSS of 1.41/100m.

Body position looks good for a big guy!
Generally, it’s not the muscle in the quads that’s causing the issue, it’s the way you are kicking. Swimmers with muscular legs tend to use their quads more when they kick which results in more knee bend. It’s the knee bend that causes your hips to sink. Not the muscle in your quads.
******************
● I have heavy legs and poor torso flexibility
Muscle density generally isn’t the biggest hurdle to floating or swimming well. Flexibility is. The most muscular athletes tend to also be the most inflexible. If you are able to increase your range of motion, you are able to help them float better and swim faster. This will require time and consistency, but it’s the key to helping you get more efficient.
******************
● I have below average buoyancy and was advised to try wearing buoyancy shorts. They have definitely been the answer to my buoyancy problems but is there a downside to wearing them?
Wearing buoyancy shorts will help you solve your sinking leg problems…. While you have them on.
Faster yes.
But just like a pull buoy that gets used too much, they give your an inflated sense of your swim fitness/ability. And it doesn’t transfer well on race day (even if you race in a wetsuit).
I have found that buoyancy shorts do nothing to help correct balance and alignment. They don’t actually contribute to becoming a better swimmer. There is a time and a place for their use in a training program. But wearing them for every workout will not help you develop your swim. In fact it will hurt your progress.
The added buoyancy usually results in you ignoring your core. Instead of turning on your core and staying connected, it relaxes. And the bridge between your lungs and your legs breaks. You still swim faster with them on because the neoprene artificially holds your hips up. But you’re ingraining poor postural habits.
Finishing Up
If there is one thing that you take away from this guide, it’s the following:
How well you currently float has little influence on how fast you could ultimately swim.
Whether your legs are short or long. Muscular or inflexible. Whether you’re new to swimming or have been struggling for years. My hope is that this guide has convinced you that you, yes you, can learn to swim faster and more efficiently.
What To Do Next
The value on the pages of this guide are only as useful as the implementation of what you learn. Acquiring the knowledge is half the battle. Now you must practice.
First identify why your legs sink. I’ve laid out 15 different reasons I see most commonly causing swimmers hips and legs to drop down in the water. Which of these are responsible for your sinking legs?
Then apply the fix. In each section I showed you how to address your issue. If you’ve downloaded the guide along with the videos you should have a very clear set of tools to start using. It’s time to get to work.
If anything doesn’t make sense or you have questions, email me rory@icanswimfast.com
Just one more thing. If you learned one thing in this guide that a friend of yours needs to learn too, why don’t you send them a link to the guide? They’ll thank you for helping them! (and you’ll make my day too!)
Here’s an email template that you can use to do this super-fast:
******************
Hi NAME,
I found some answers to why our legs sink like rocks! Here’s a guide that I found really helpful. I think it will help you a ton too. You can find it here:
http://www.icanswimfast.com/sinking-legs
Take care,
******************
If someone sent you this PDF and you aren’t getting the bonuses I send out after you download the Guide, you should go to http://www.icanswimfast.com/sinking-legs sign up.
Why?
Because I’ll send you a lot more simple advice that you won’t be able to get elsewhere.
Thanks for reading!